> ## Documentation Index
> Fetch the complete documentation index at: https://docs.onestack.cloud/llms.txt
> Use this file to discover all available pages before exploring further.
# Manage projects with states
> Pro
Project States allows you to track the overall progress of your projects. With this tool, you can categorize projects into different states, helping you quickly identify which projects need attention and which are on track.
This feature provides a central view of all projects in your workspace, making it easier to manage priorities and understand progress.
## Enable Project States[](#enable-project-states "Direct link to Enable Project States")
> **Role**: Workspace Admins
1. Navigate to **Workspace Settings > Project States**.  2. Toggle the switch to turn on the feature.
3. There are default project state groups:
* **Draft**
* **Planning**
* **Execution**
* **Monitoring**
* **Completed**
* **Cancelled**
2. Toggle the switch to turn on the feature.
3. There are default project state groups:
* **Draft**
* **Planning**
* **Execution**
* **Monitoring**
* **Completed**
* **Cancelled**
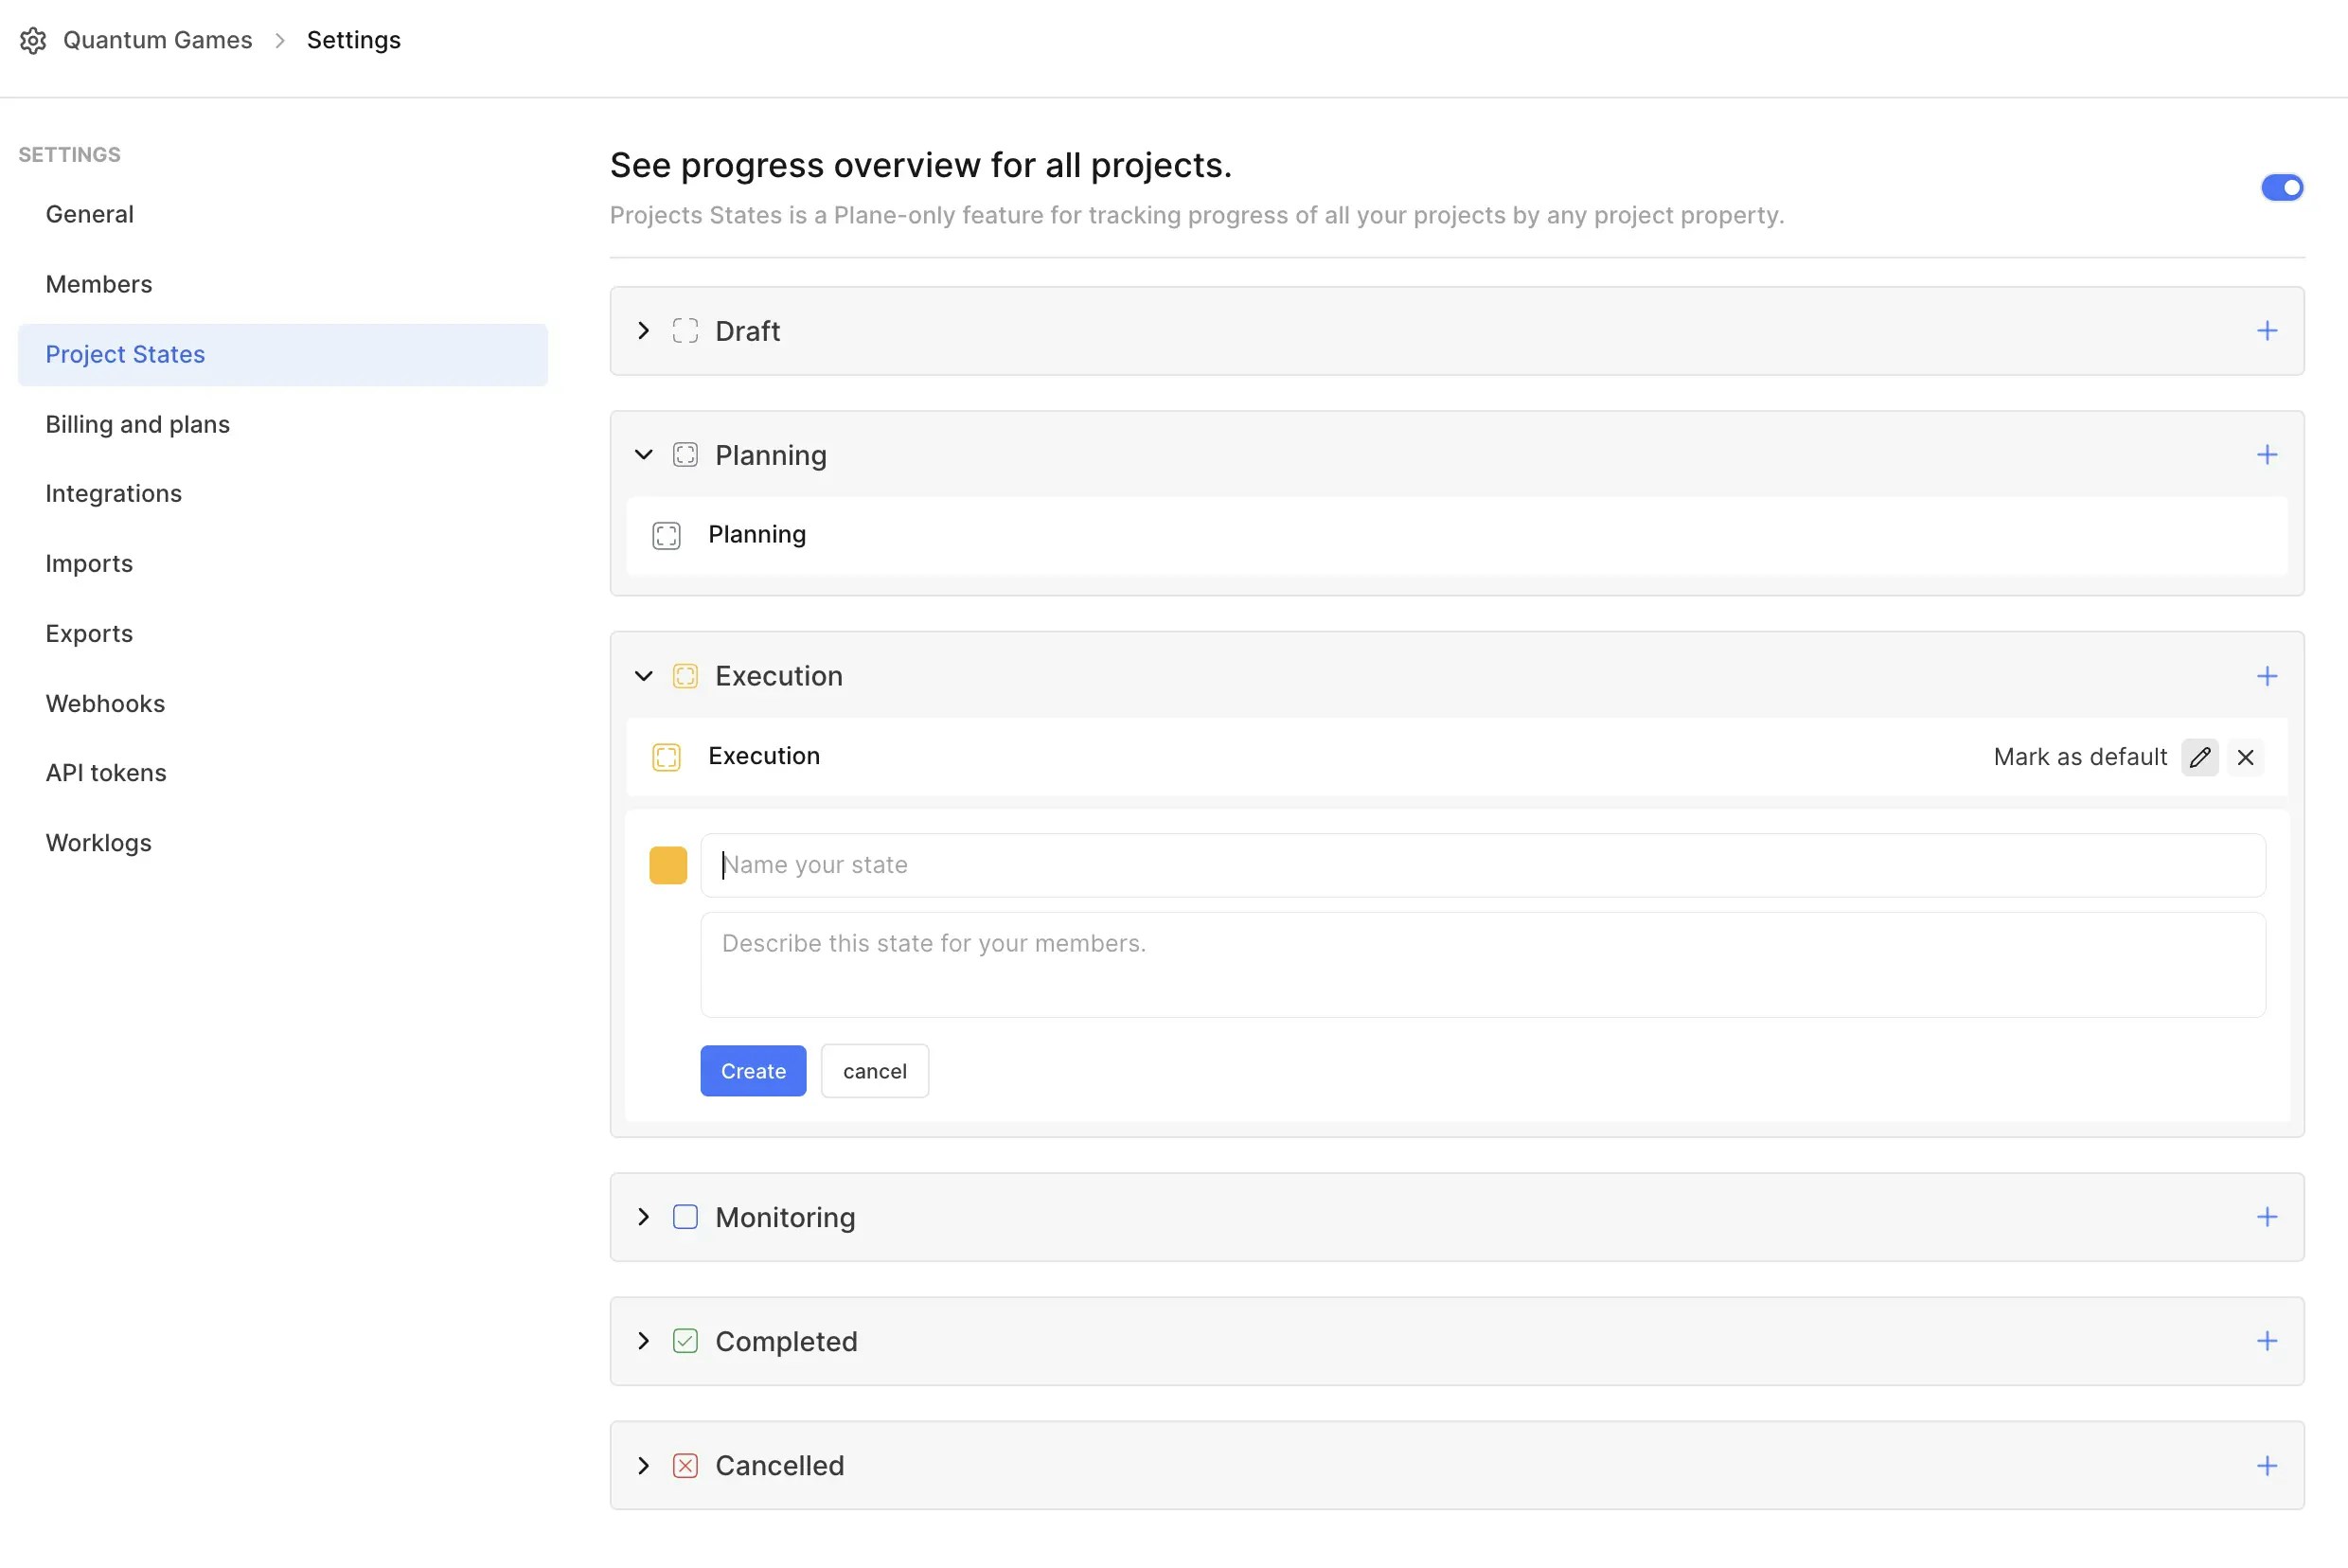 4. **Modify state**
1. Click the pencil icon to edit the default state name and description.
2. Click **Update** to save changes.
5. **Add new state**
1. Use the **+** button to add a new state.
2. Provide a name and description for the new state.
3. Click **Create**.
You’ll be able to apply these states to all projects in your workspace and begin tracking their progress.
## Modify Project properties[](#modify-project-properties "Direct link to Modify Project properties")
1. Navigate to **Projects** on the sidebar.
4. **Modify state**
1. Click the pencil icon to edit the default state name and description.
2. Click **Update** to save changes.
5. **Add new state**
1. Use the **+** button to add a new state.
2. Provide a name and description for the new state.
3. Click **Create**.
You’ll be able to apply these states to all projects in your workspace and begin tracking their progress.
## Modify Project properties[](#modify-project-properties "Direct link to Modify Project properties")
1. Navigate to **Projects** on the sidebar.  2. In each project card, you'll see a bunch of project properties.
* **State**: Set the project state.
* **Priority**: Highlight high-priority projects.
* **Lead**: Assign or change the project lead.
* **Members**: Update the team members working on the project.
* **Start and end Dates**: Add or adjust timelines.
## Why use Project States?[](#why-use-project-states "Direct link to Why use Project States?")
* **Stay organized** Group projects based on their current stage, making it easier to prioritize and plan.
* **Quick overview** Gain a snapshot of all projects from a single view.
* **Customizable workflow** Adapt states to fit your team’s unique processes.
2. In each project card, you'll see a bunch of project properties.
* **State**: Set the project state.
* **Priority**: Highlight high-priority projects.
* **Lead**: Assign or change the project lead.
* **Members**: Update the team members working on the project.
* **Start and end Dates**: Add or adjust timelines.
## Why use Project States?[](#why-use-project-states "Direct link to Why use Project States?")
* **Stay organized** Group projects based on their current stage, making it easier to prioritize and plan.
* **Quick overview** Gain a snapshot of all projects from a single view.
* **Customizable workflow** Adapt states to fit your team’s unique processes.