Work item Types unlock a whole new way of adding, editing, and moving work forward in Plane. The default work item type called Issue is great for starting with Plane, but as you advance in your project management journey, you find the need for names and properties unique to the type of work you are doing.
For example, your Marketing team may need a work item type called Content with the properties, Channel, SEO done?, and Reviewer — properties that aren’t available on the default Work items. Your Engineering team, on the other hand, may want a work item type called Bugs with the properties Version and Environment to have more upfront info per bug reported.
Work item Types make these and infinite other use cases possible.
Set up your workspace
Create work item types
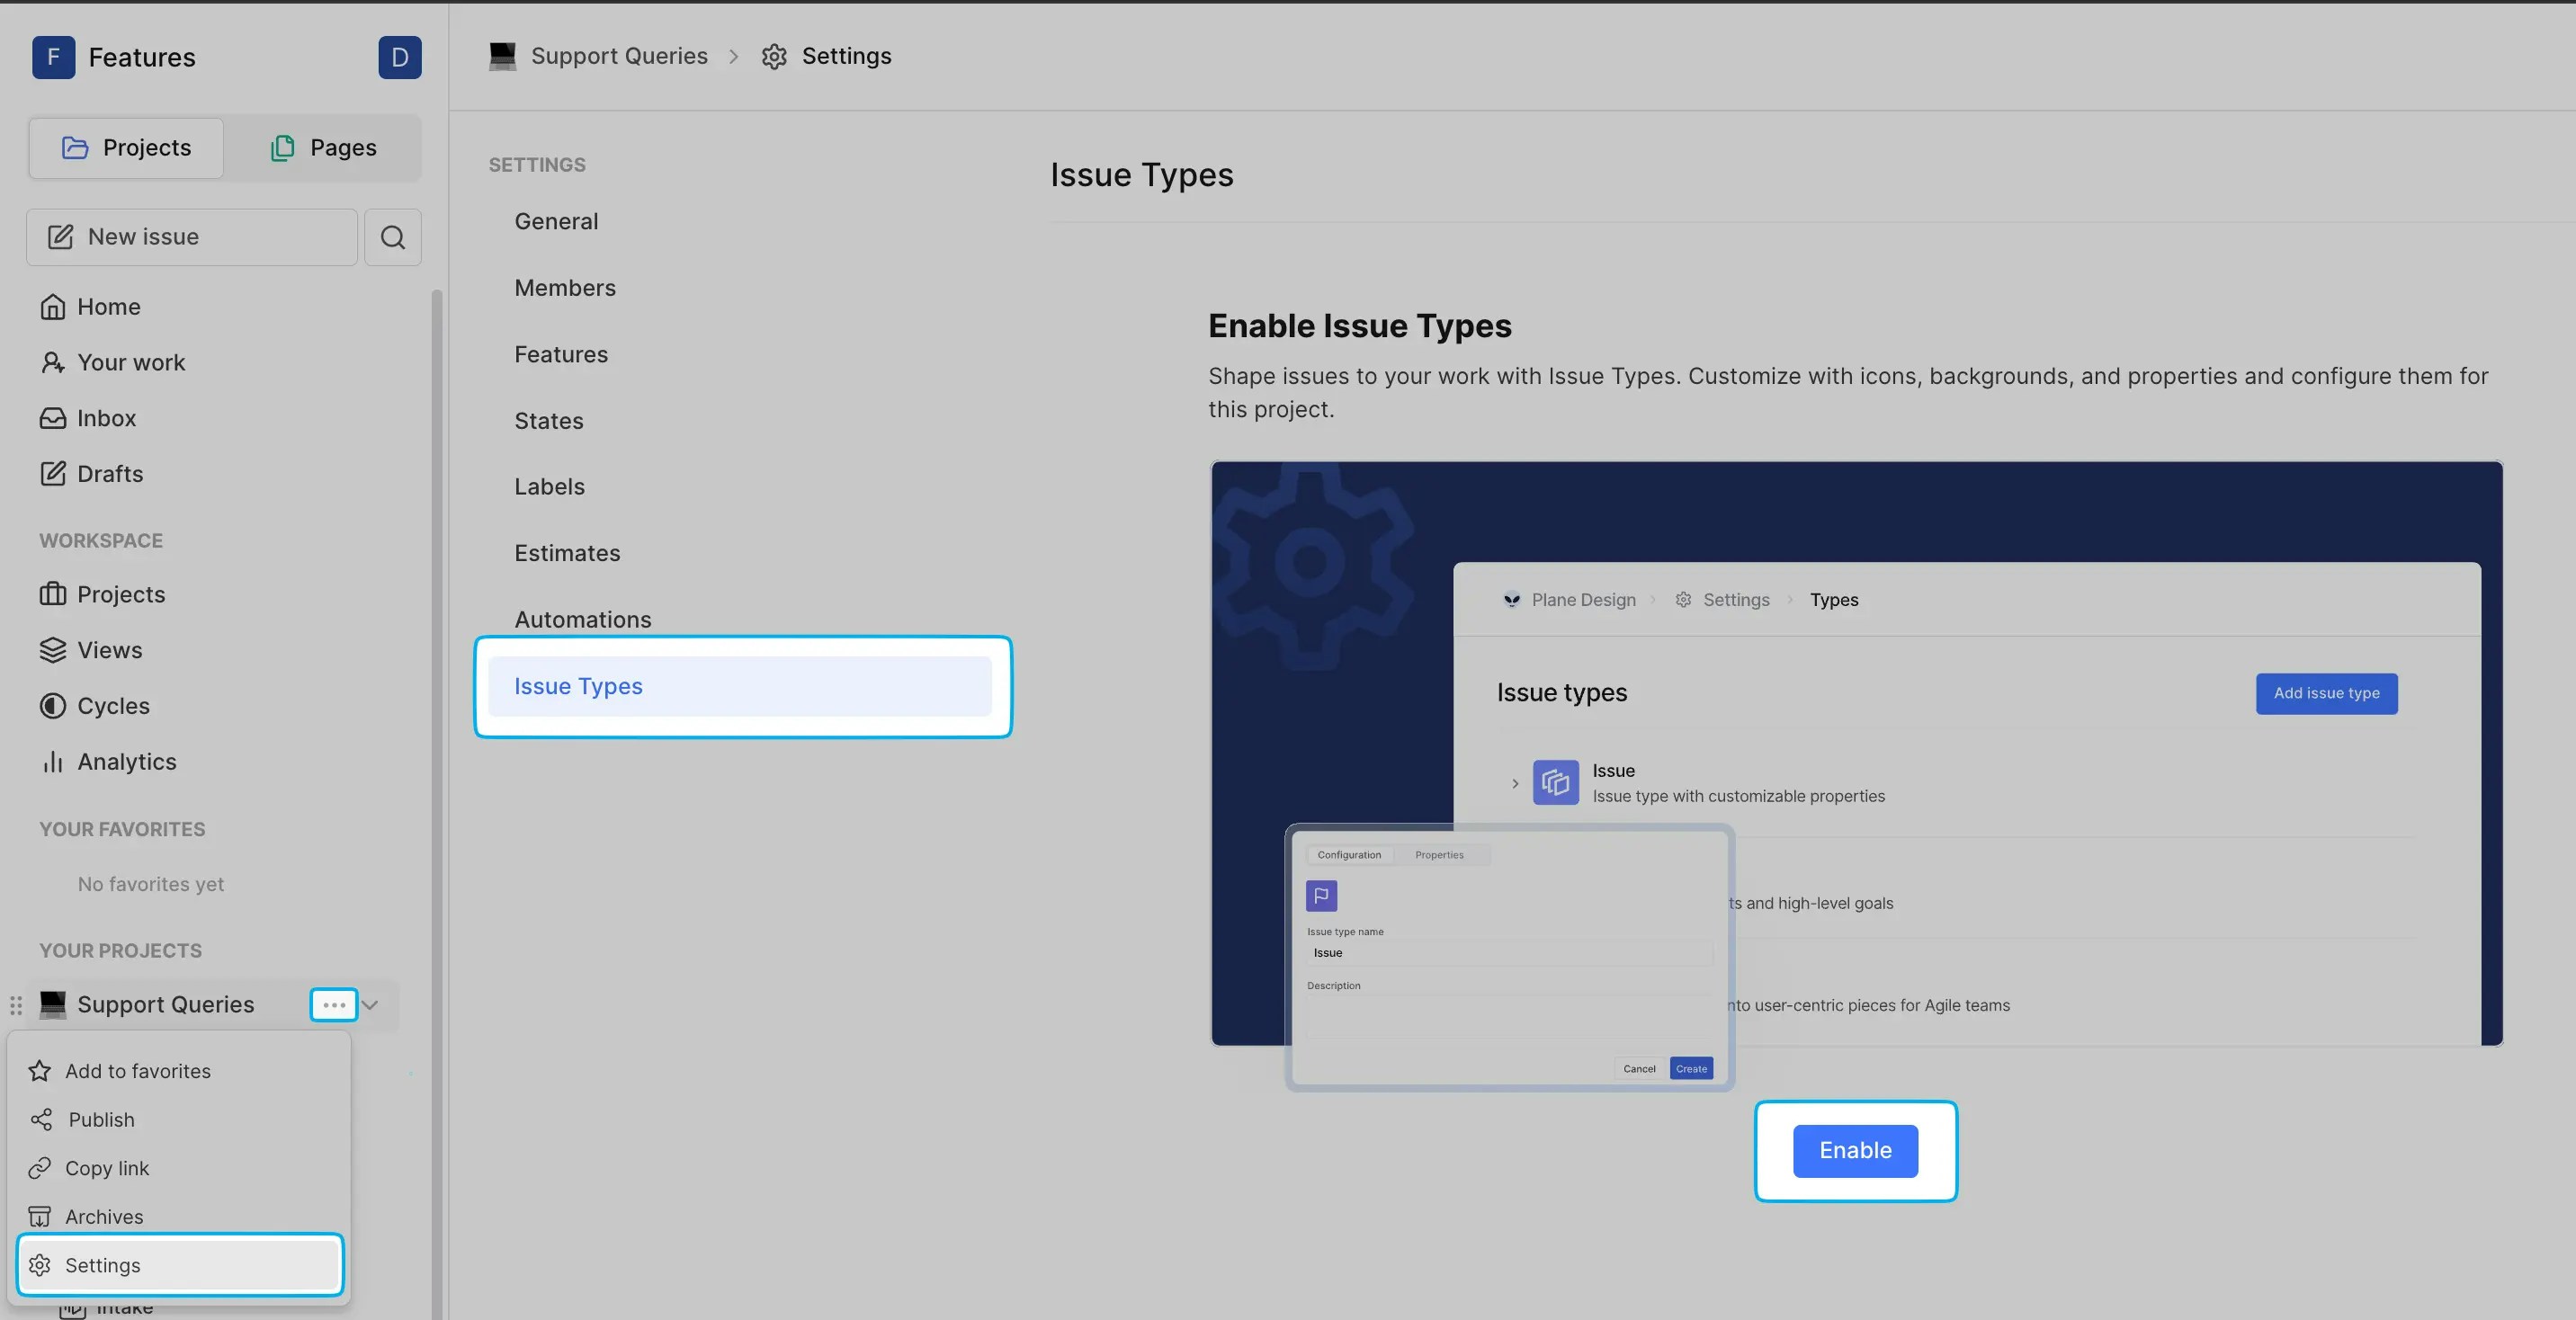
The Work item Types feature cannot be disabled once turned on for a Plane project.
Role: Project Admins
- Click the … icon next to your project name on the sidebar and click Settings.
- Select Work item Types on the right pane.
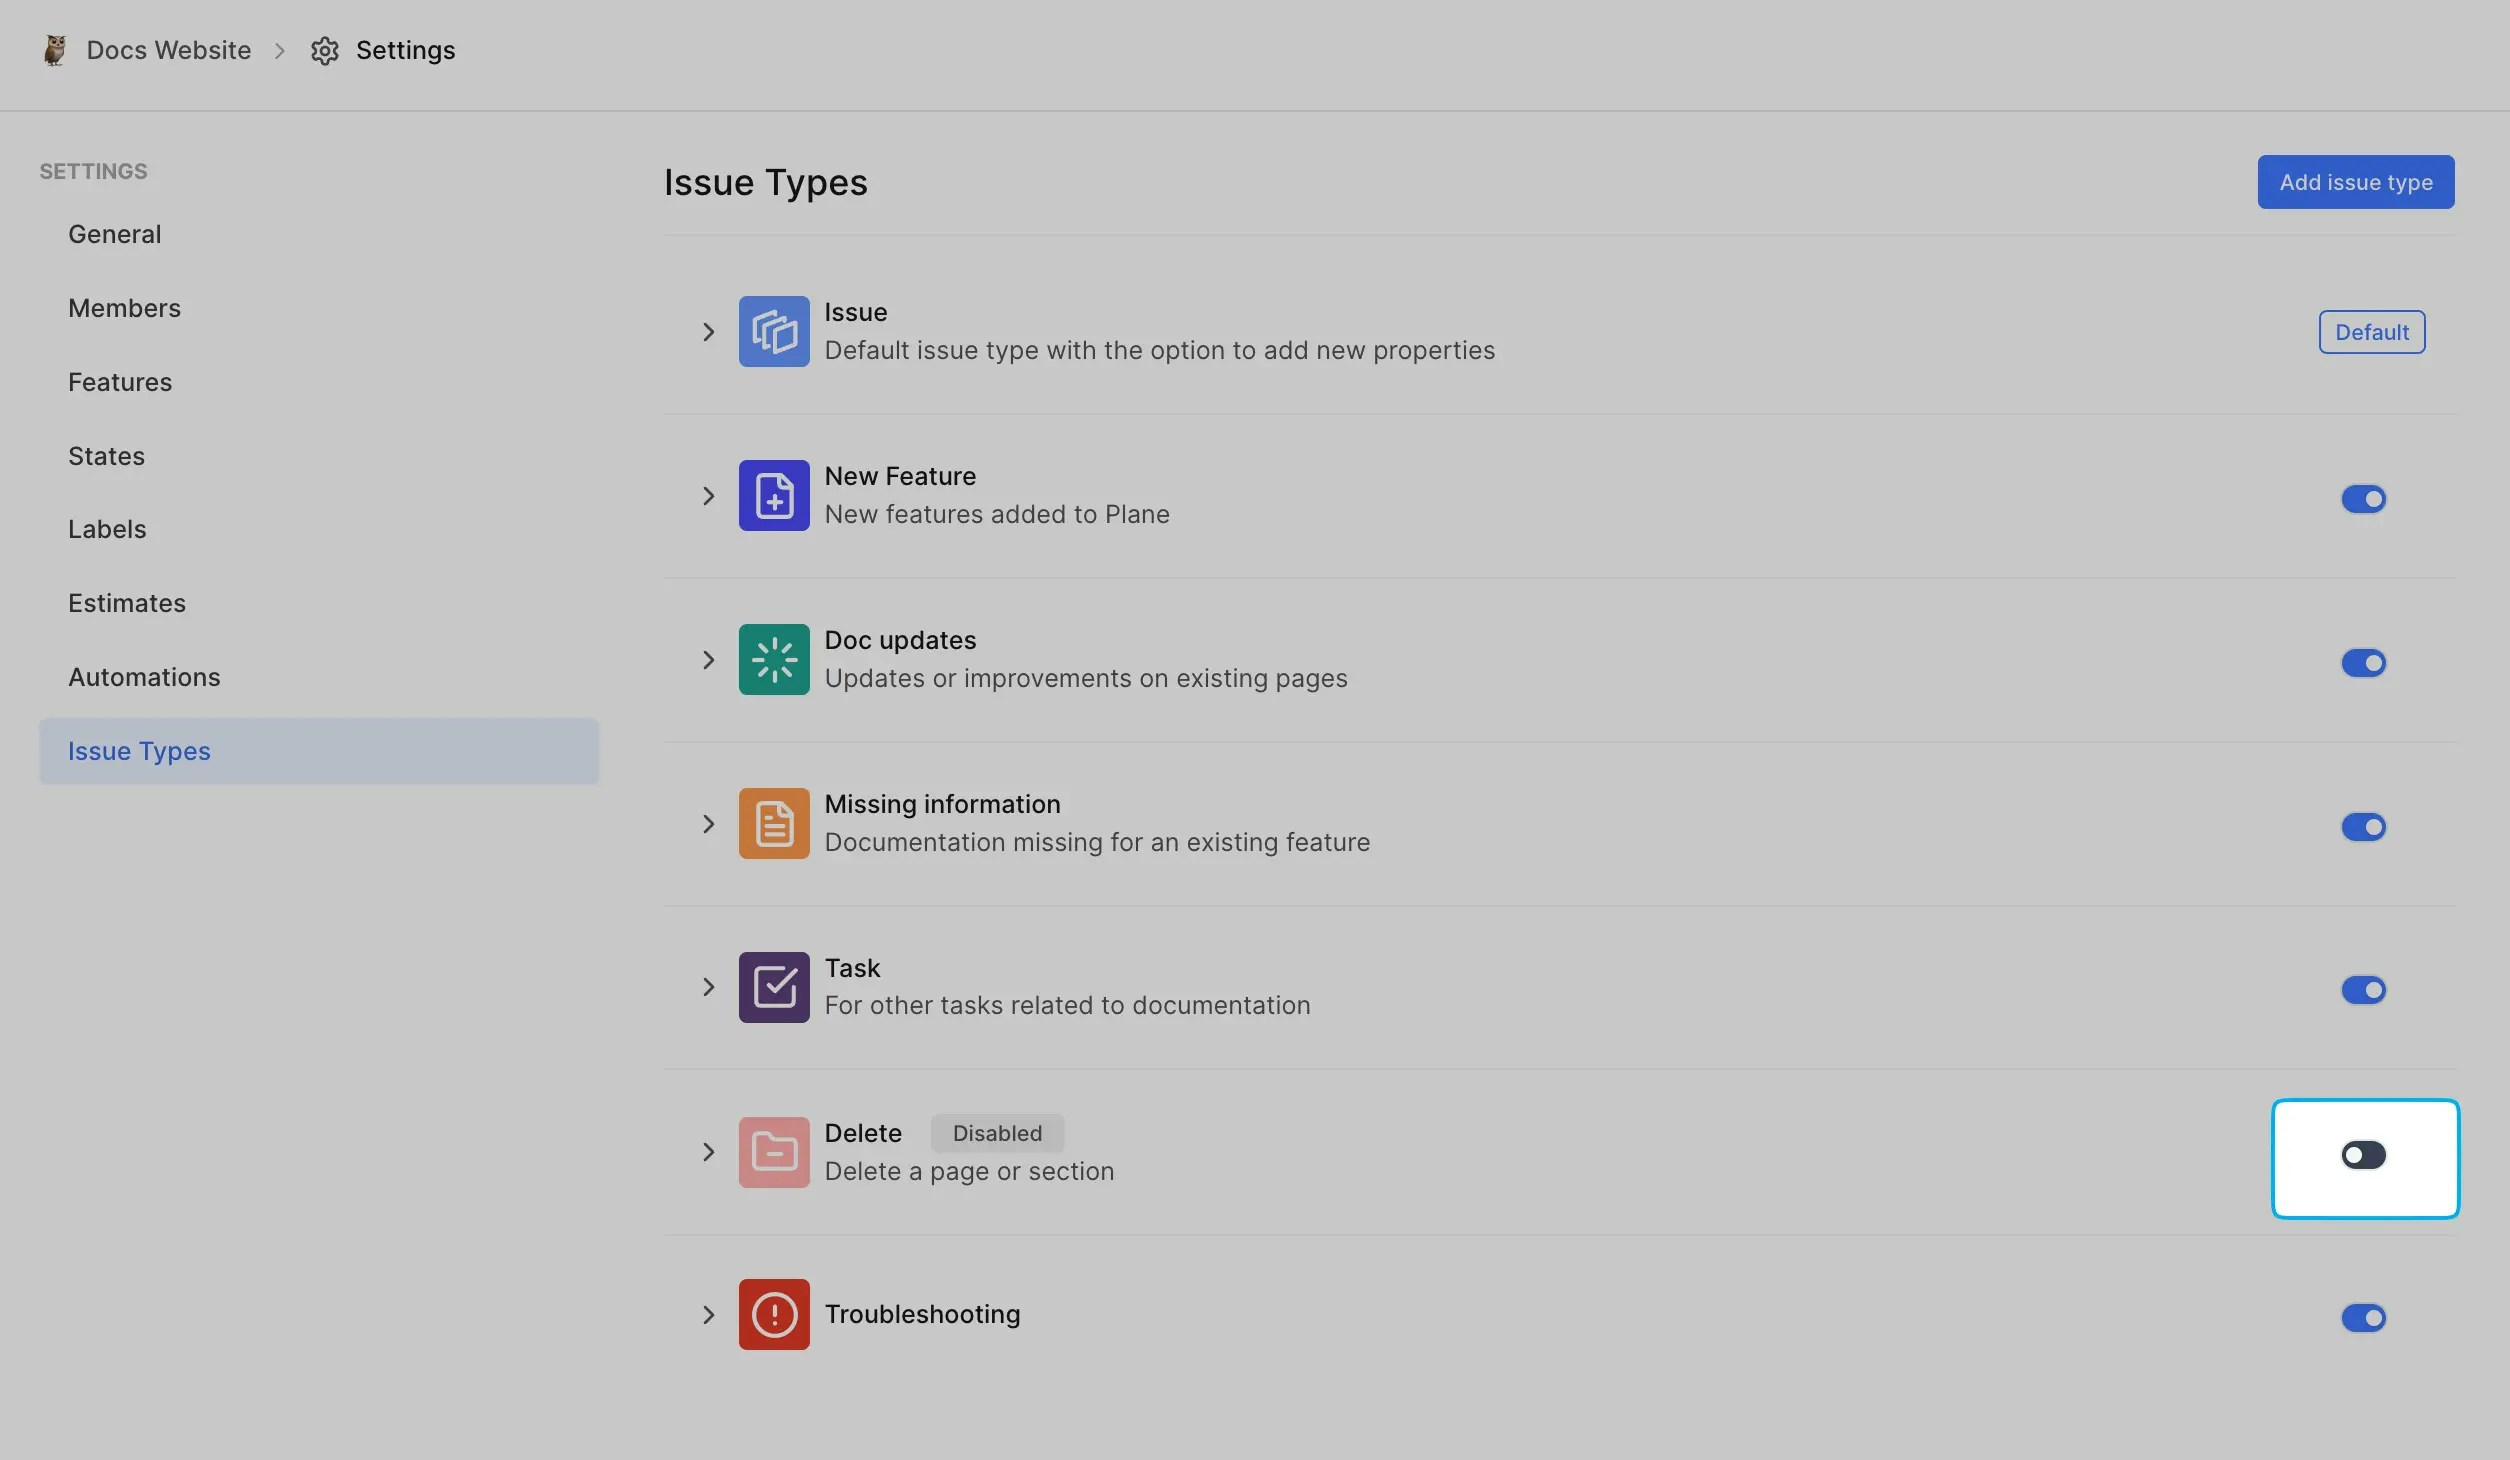
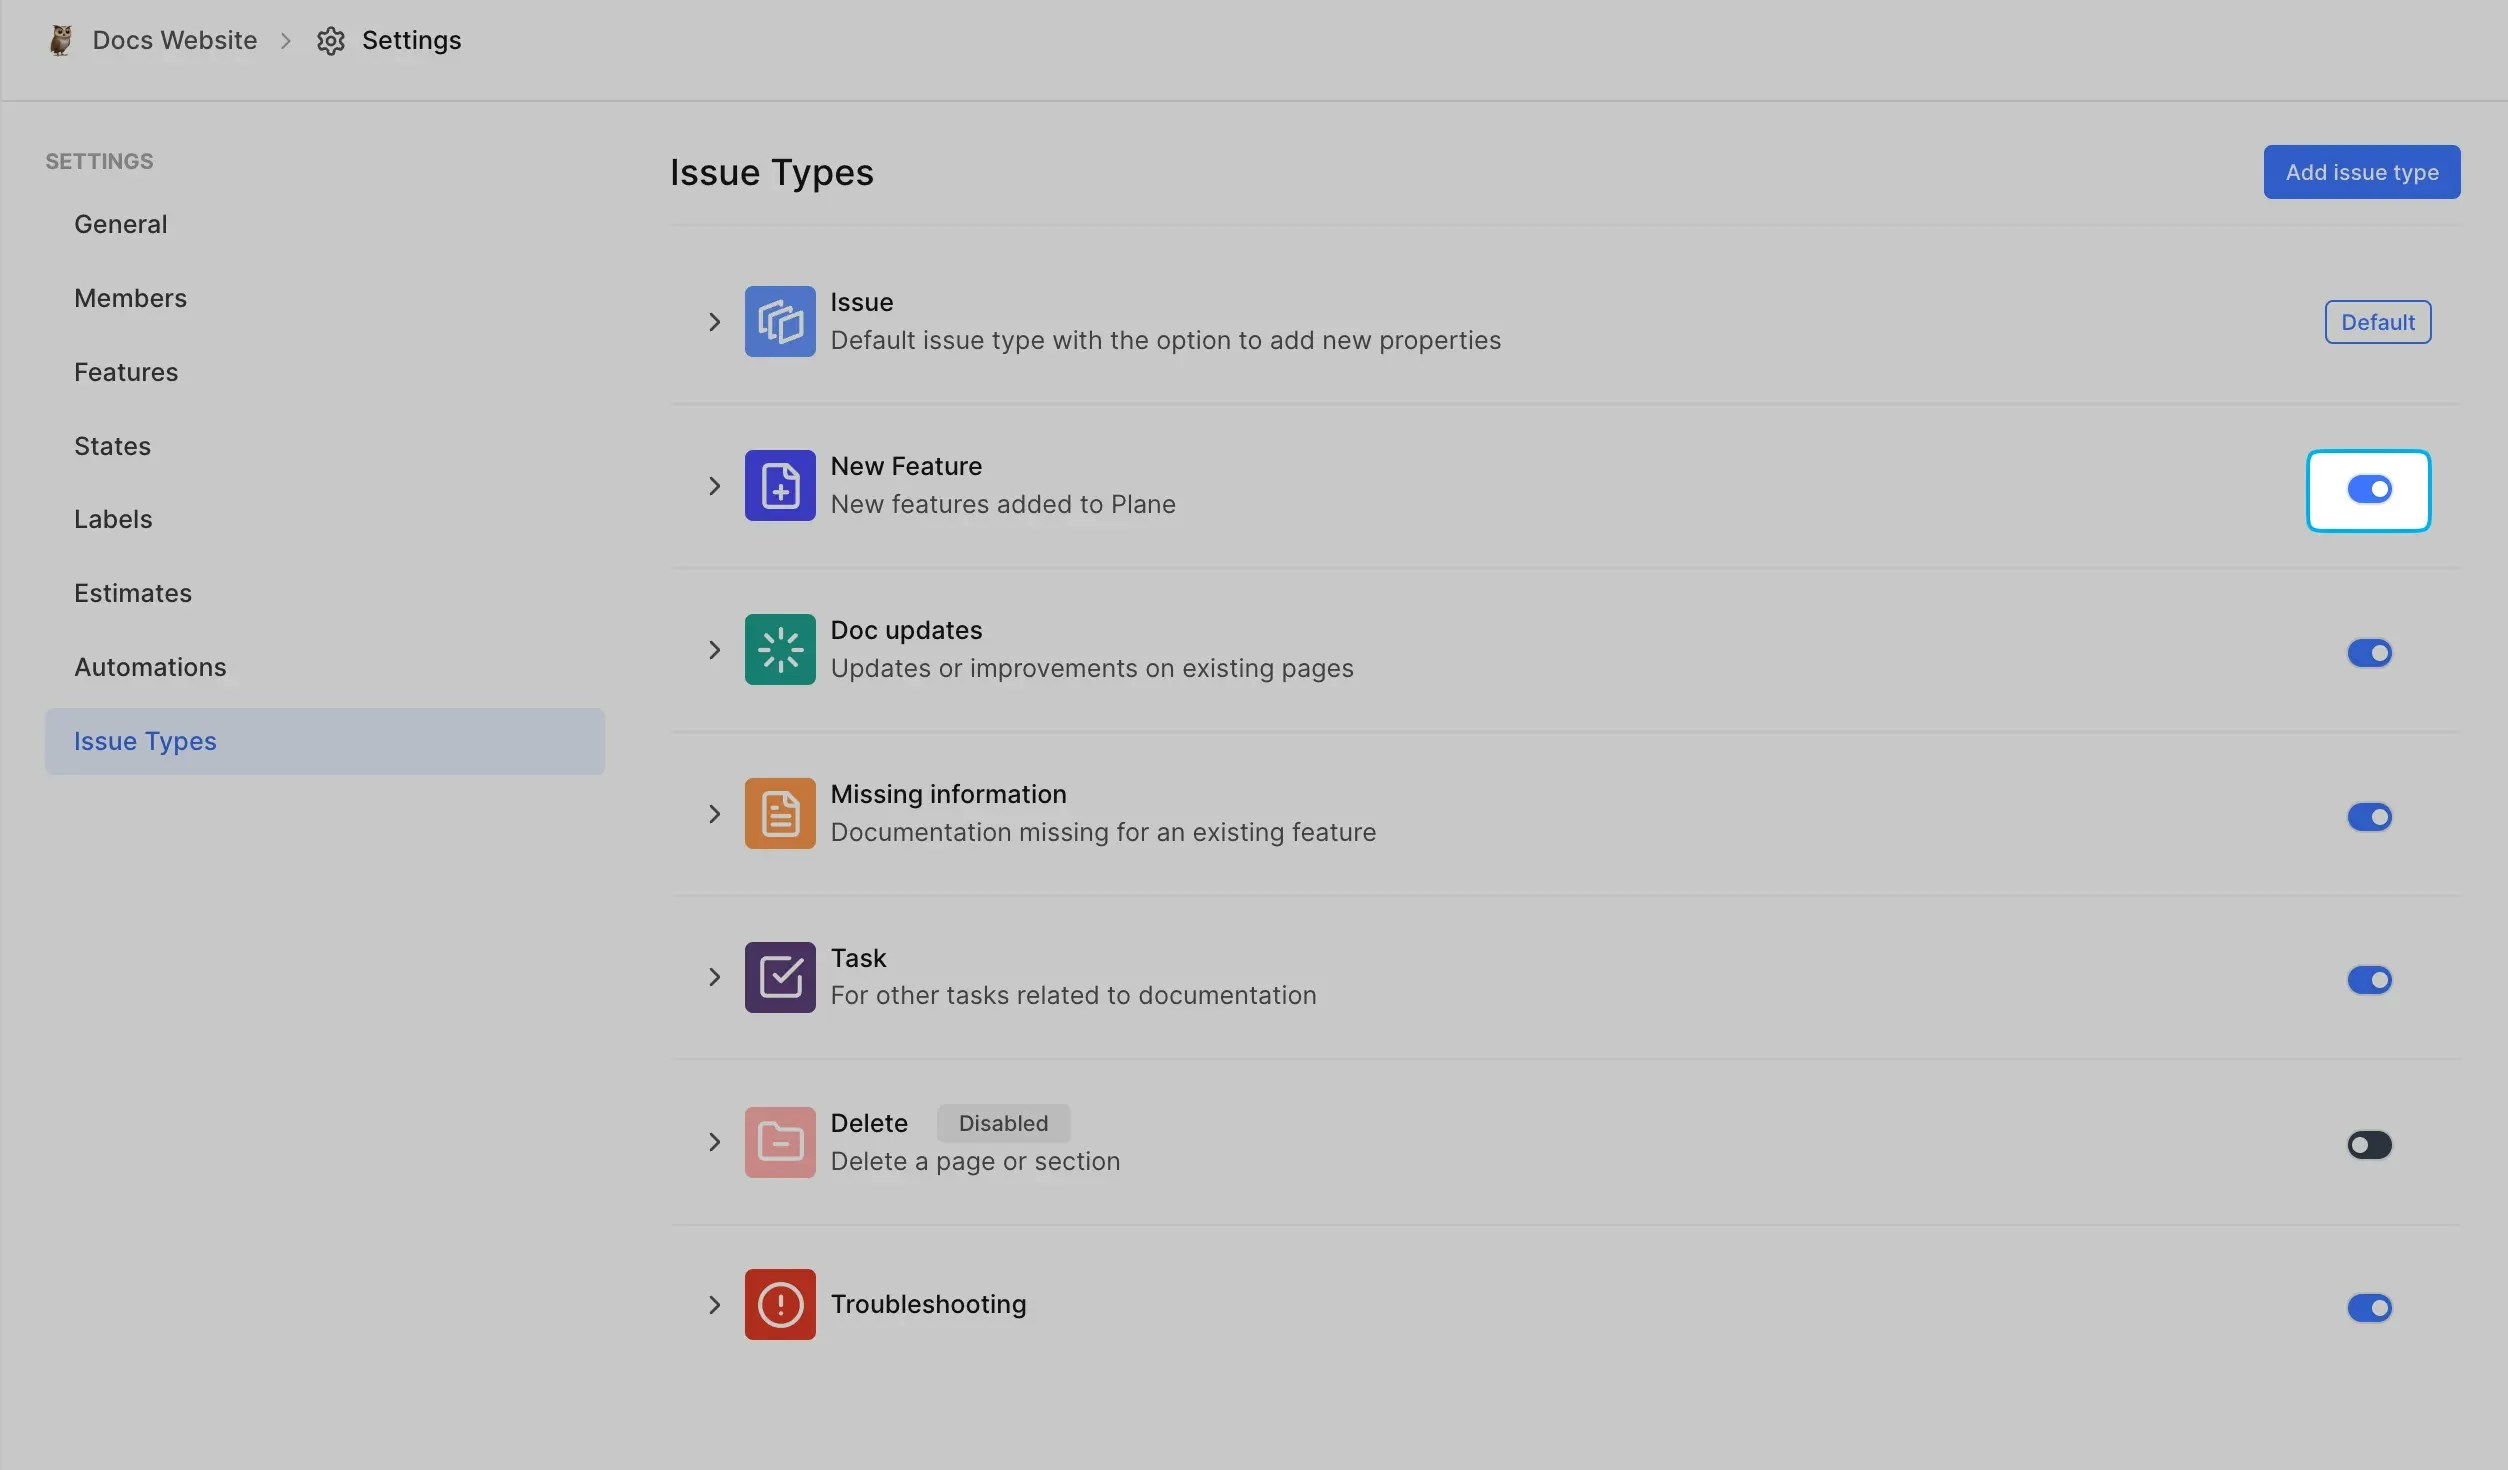
- Click the Enable button to start creating work item types for your project.
- The default type is called
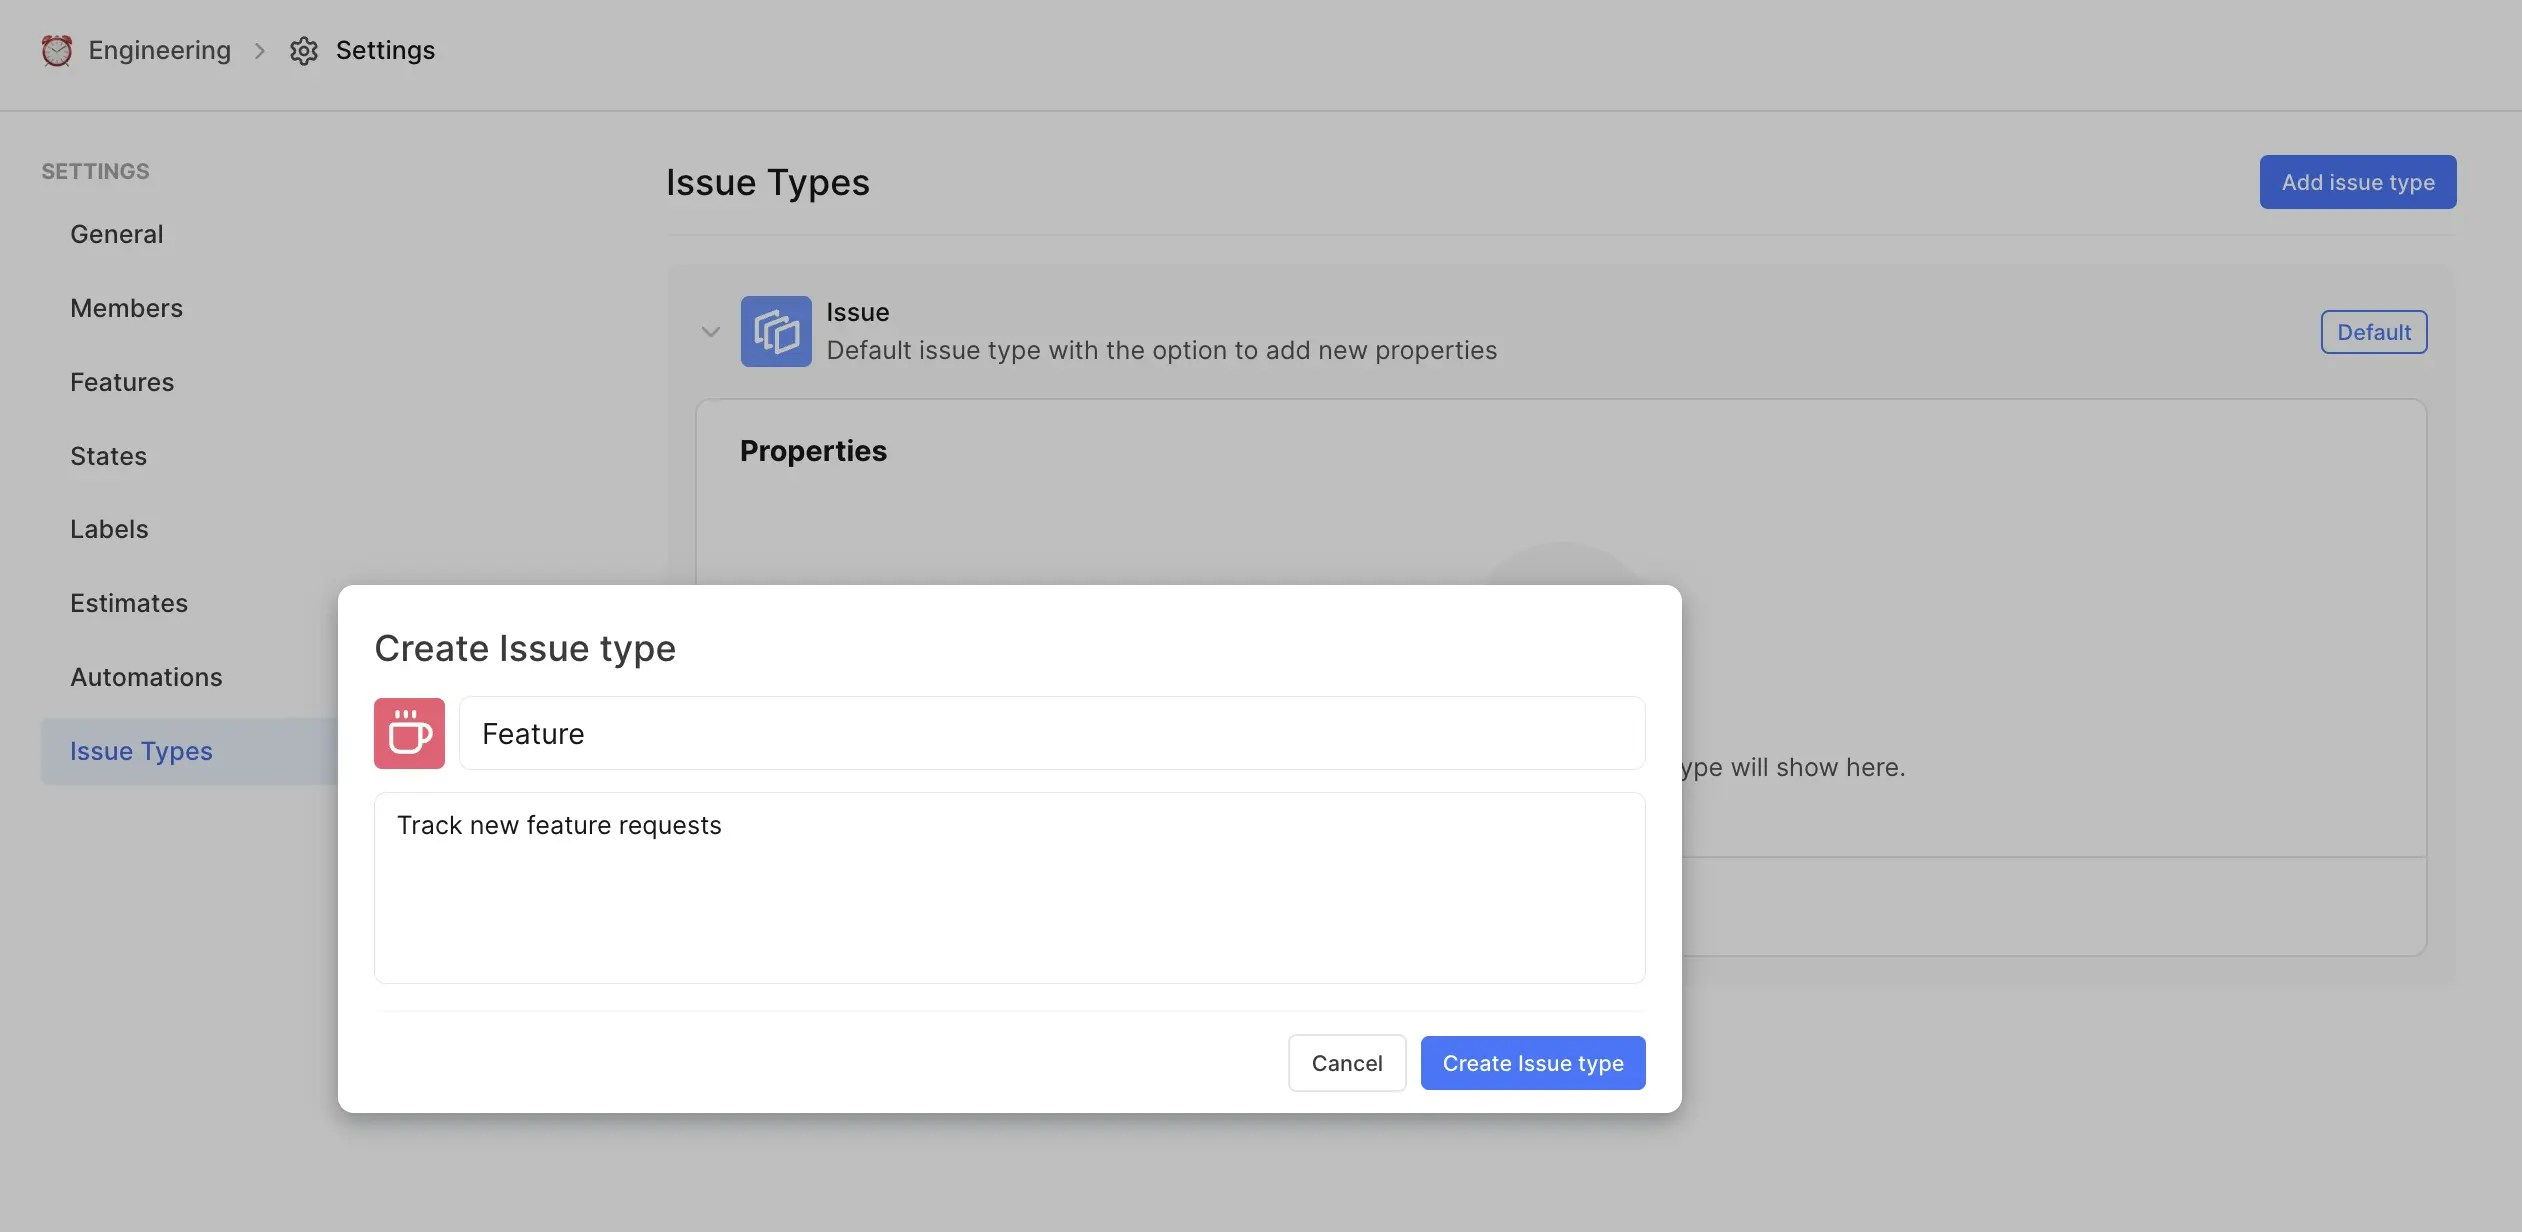
Issue. Click the Add Work item Type button to create a new work item type. 
- In the Create work item type modal, type name, and description, and choose a background color and an icon to represent the work item type. Click the Create work item type button.
- Switch on the toggle button to allow users to select the work item type when creating work items and sub-work items.
Examples of work item types
-
IT development teams
Bug Improvement Epic Story
-
IT support teams
Incident Change Service request New feature
-
Product management
Product launches User research Feature development Market analysis
-
Production units (automobile)
Production planning, Material procurement, Quality control, Inventory management
-
Design agencies
Revision requests Design drafting Client presentation Quality assurance
-
NGOs
Grant writing Volunteer coordination Beneficiary management
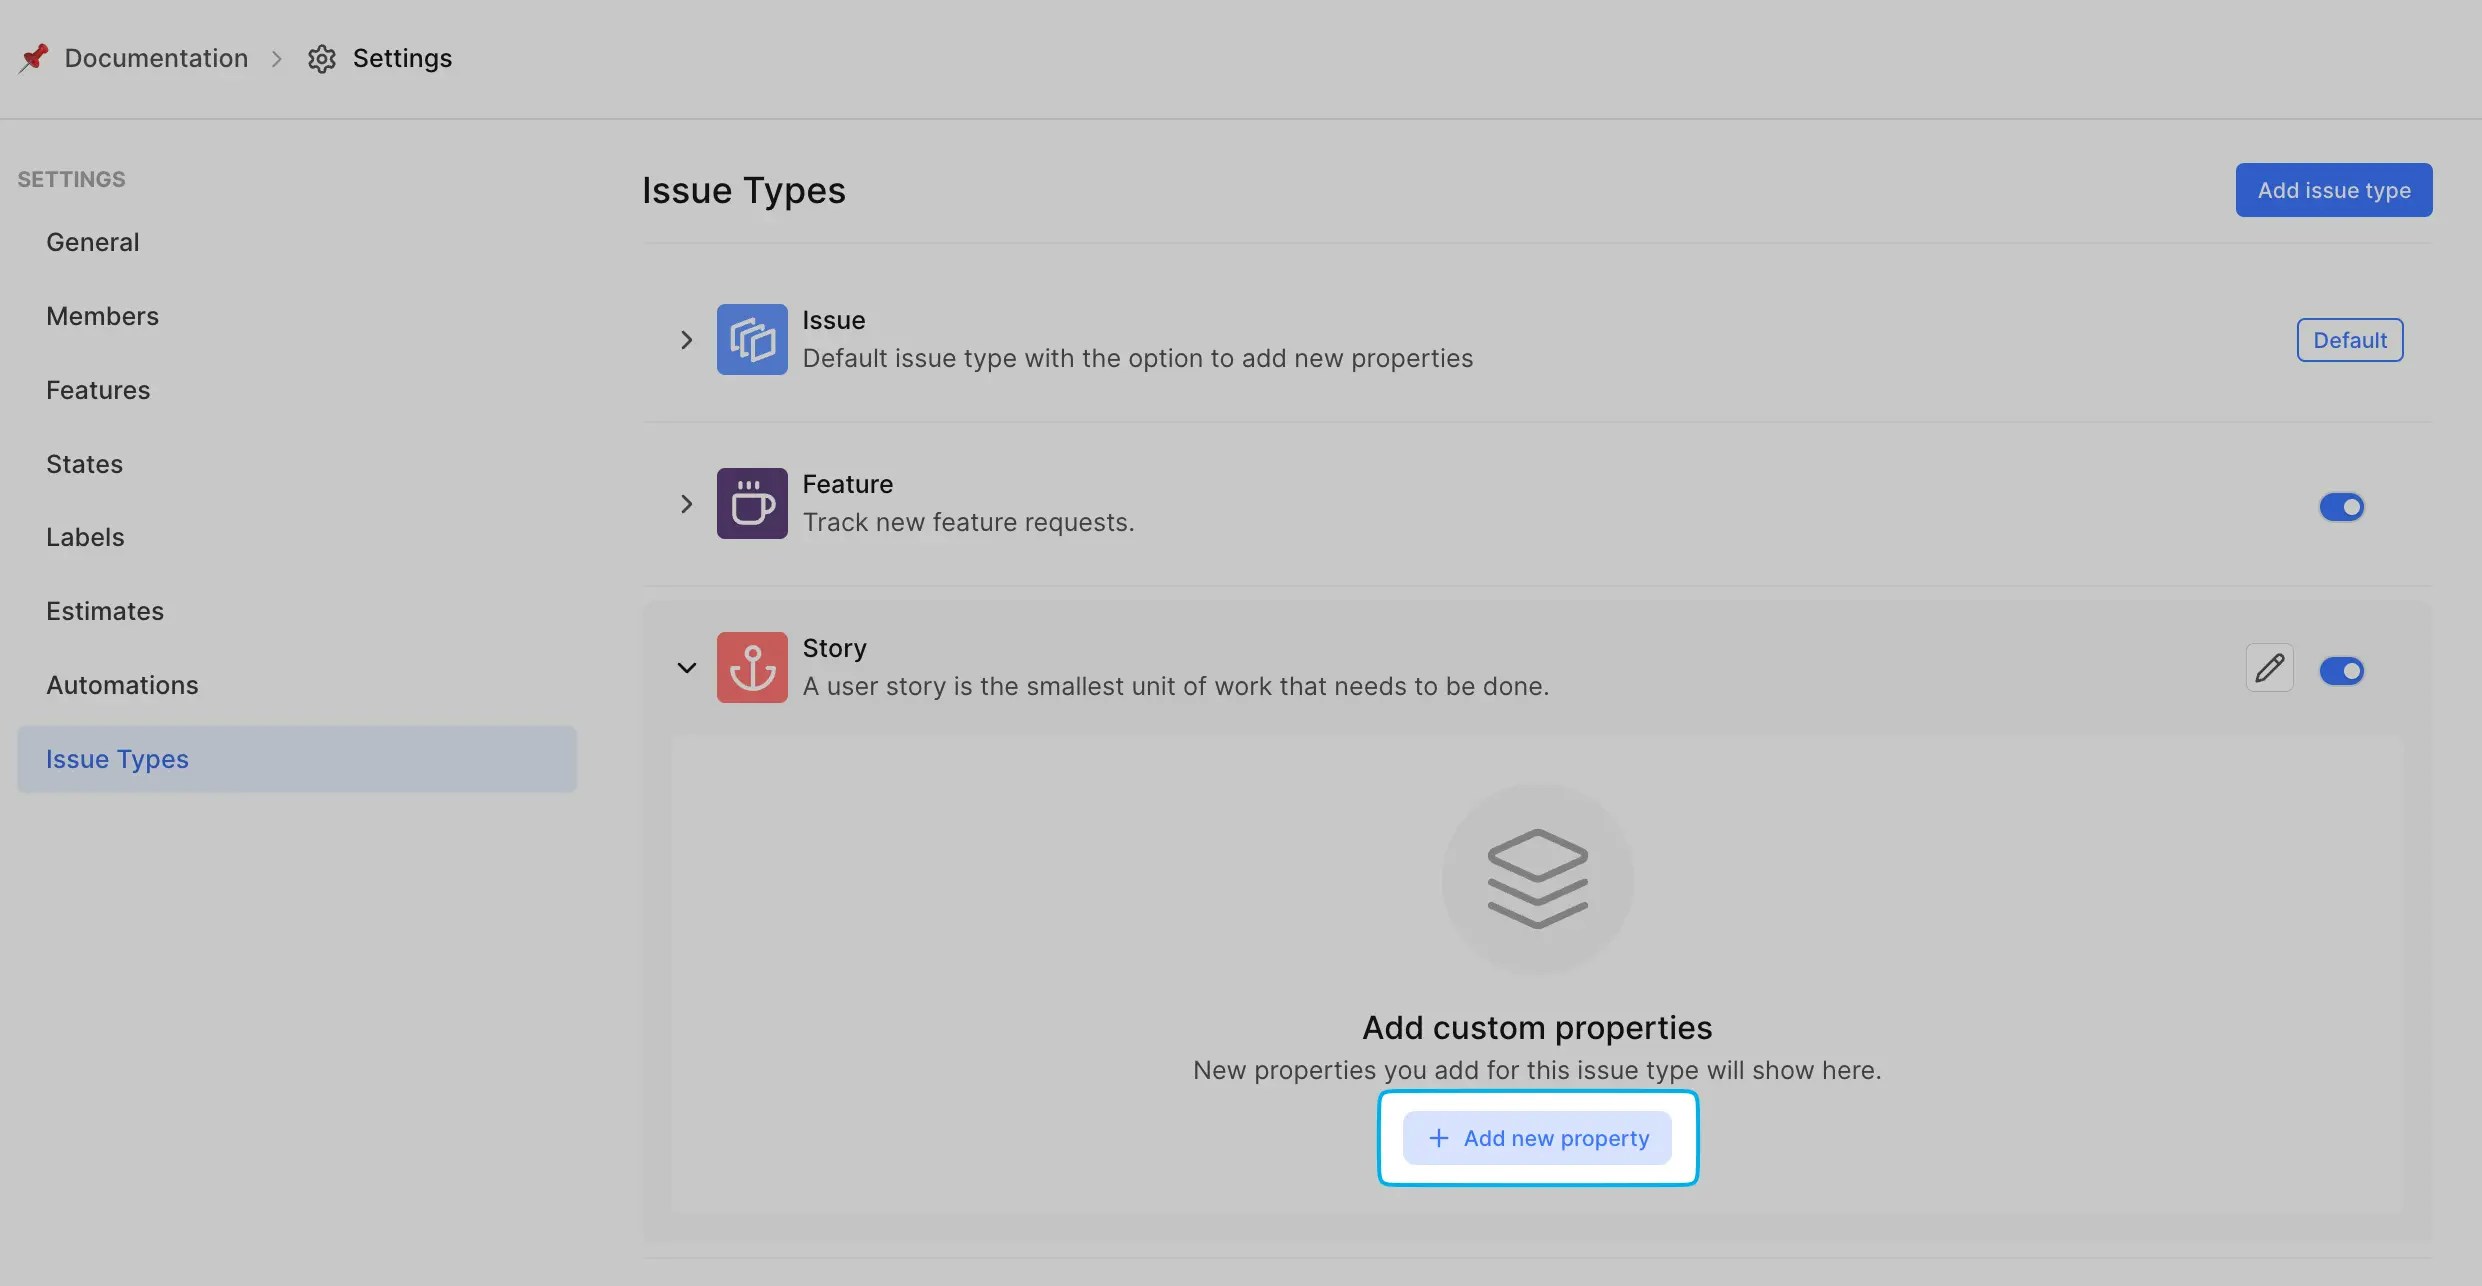
Add custom properties
Role: Project Admins
Adding custom properties to the default work item type Issue and other newly created work item types is possible.
- Under the work item type, click Add New Property to create custom fields.
- Specify values for Title, Description and Property type of the new property.
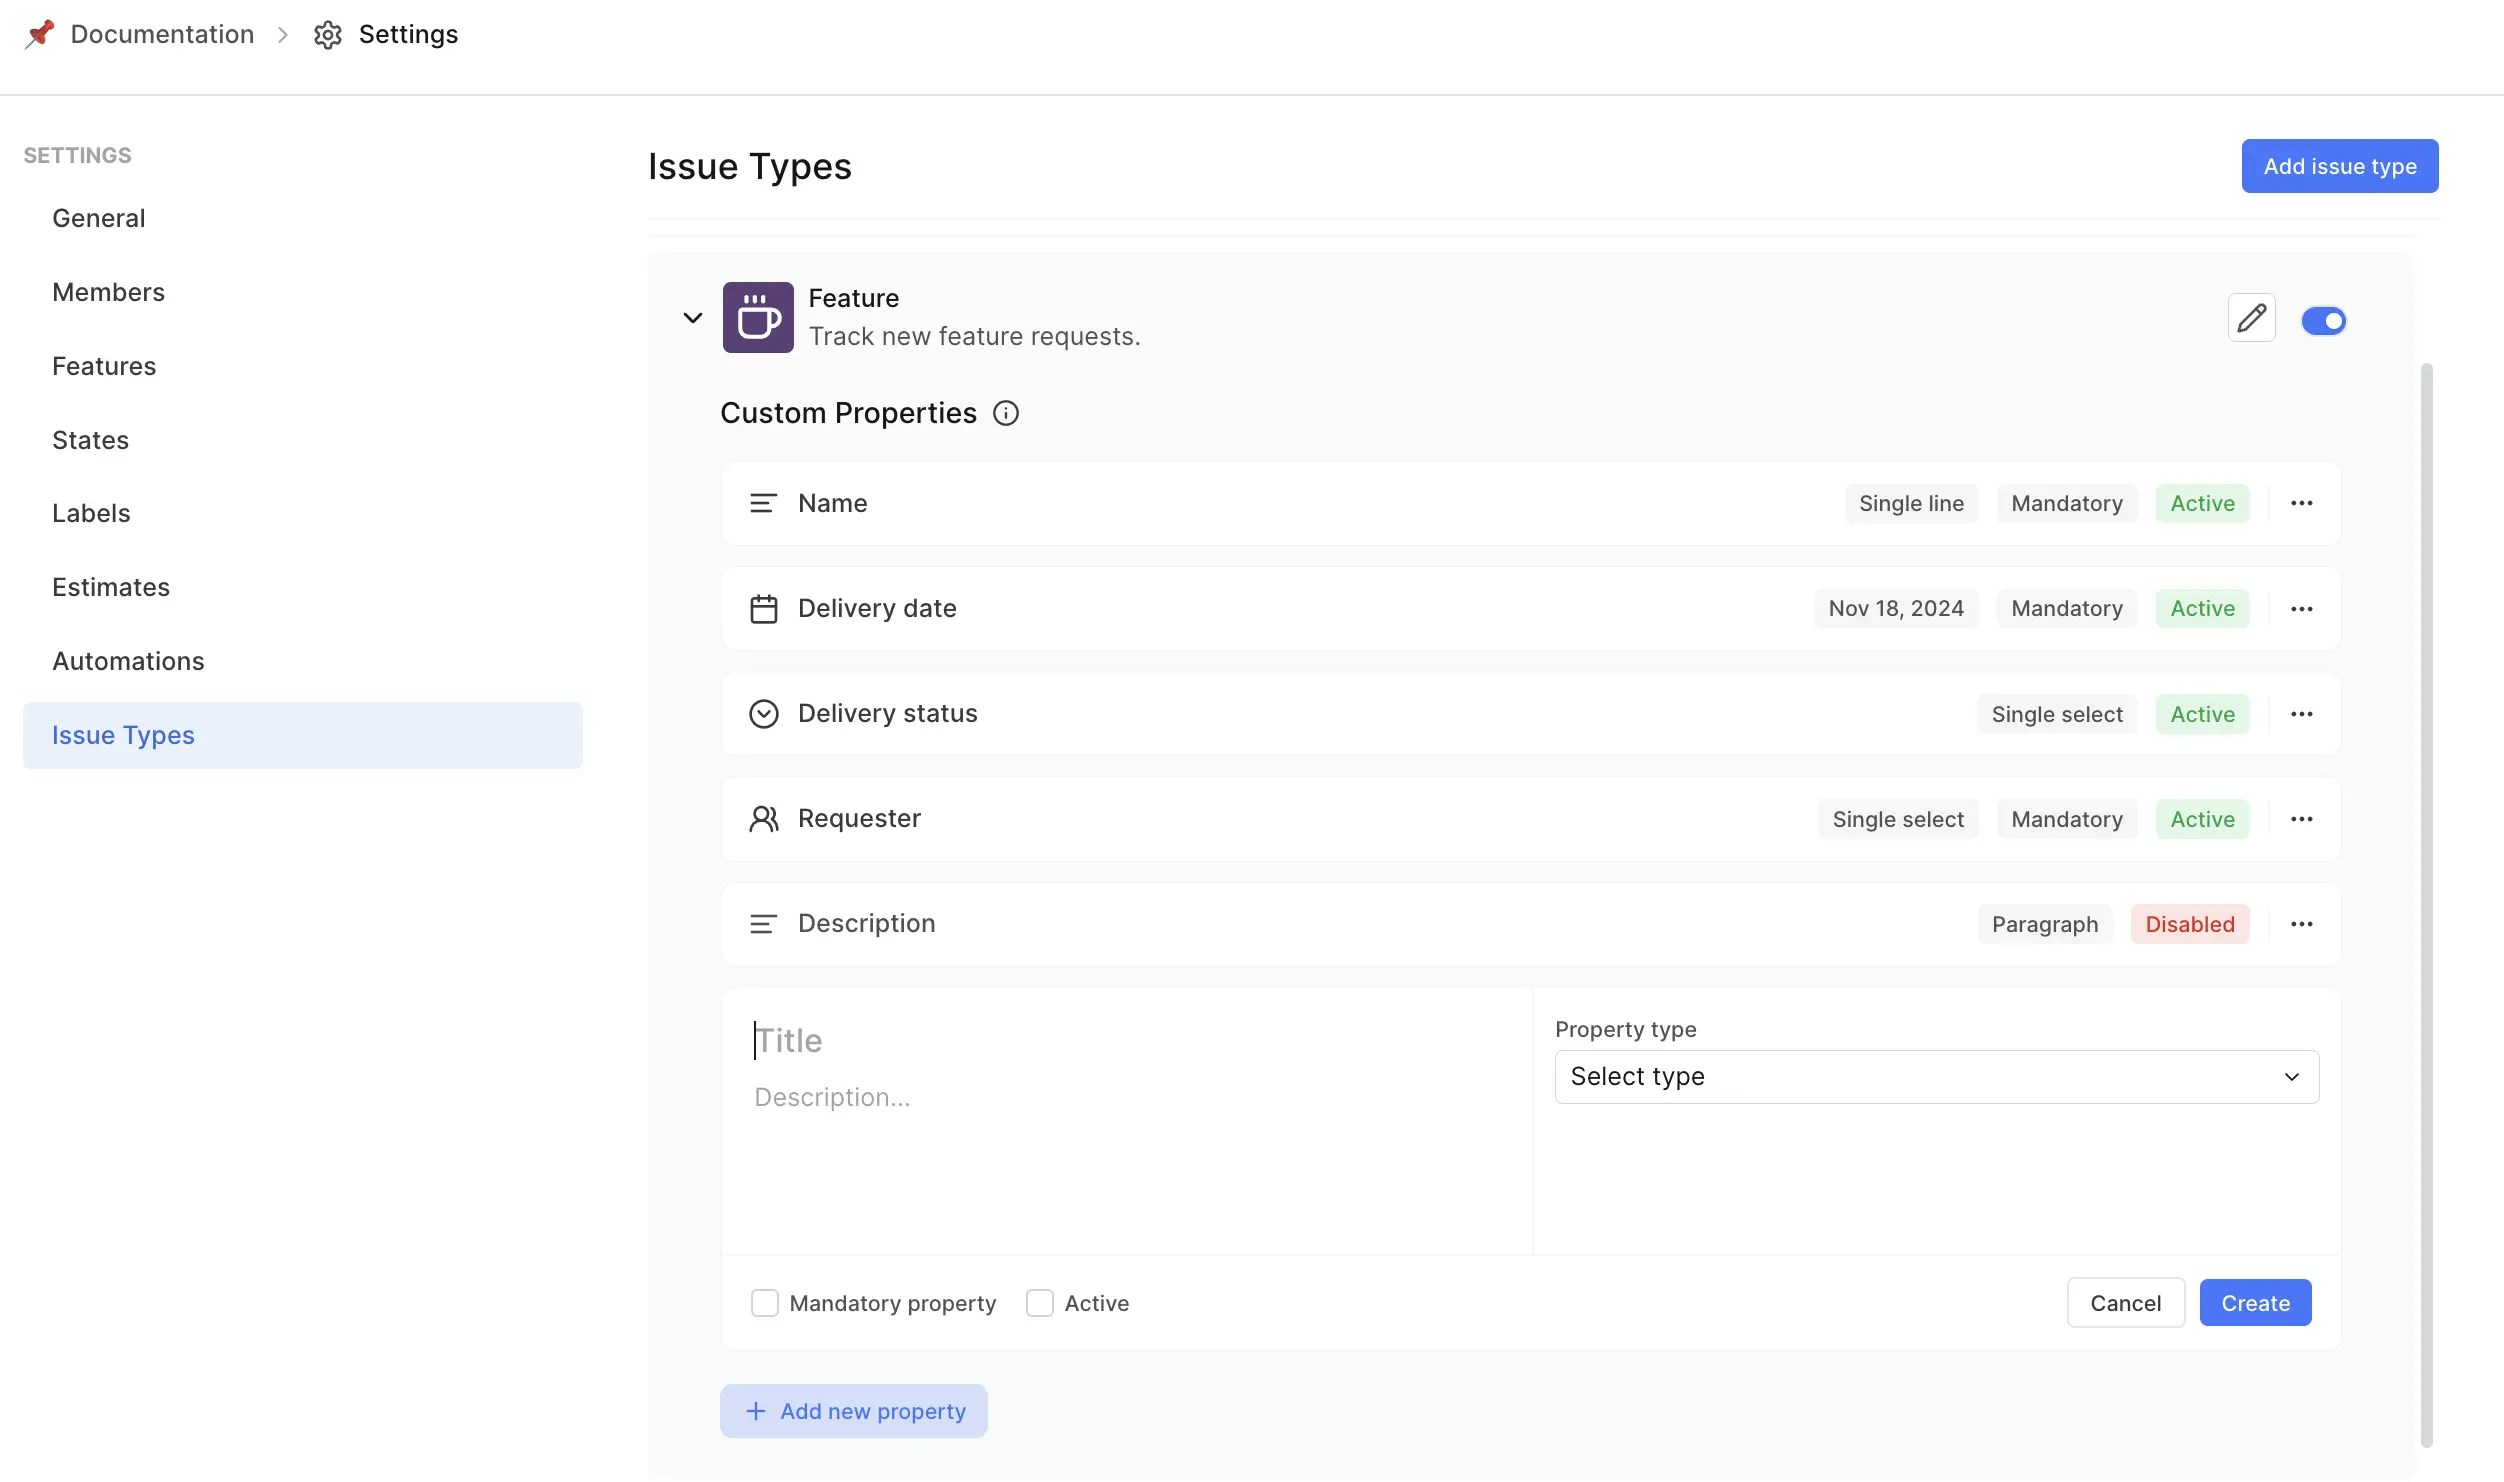
- Select the Mandatory property checkbox if it’s a required field. Select the Active checkbox to make the property visible in work items.
- Click Create to add the property to the work item type.
Before you delete properties, switch off the Active toggle button to avoid data loss.
Property types
Here’s a list of all the property types and attributes that Plane provides for creating custom fields:
| Property type | Attributes | Notes |
|---|
| Text | Single line, Paragraph, Read-only | The Read-only attribute cannot be marked as mandatory. Enter text in the Read only data box for this option. |
| Number | Default value | An optional default value can be given to this property type. |
| Dropdown | Single select, Multi select, Add options | Specify the values for the dropdown under Add options. |
| Boolean | True/False | Default value is false. This attribute cannot be marked as mandatory. |
| Date | Date Format | Consistent date format across all properties. |
| Member picker | Single Select, Multi select | Displays a list of all project members. |
Examples of custom properties
-
Product launch
Launch date Geography Budget Approval status Stakeholder
-
Bug
Affected version Resolved version Environment Steps to reproduce Approval status Customer impact
-
Final design approval
Final design files Approval checklist Client approval date Responsible person
Use work item types
Once the project Admin sets up the work item types any project member can use them when creating work items or sub-work items.
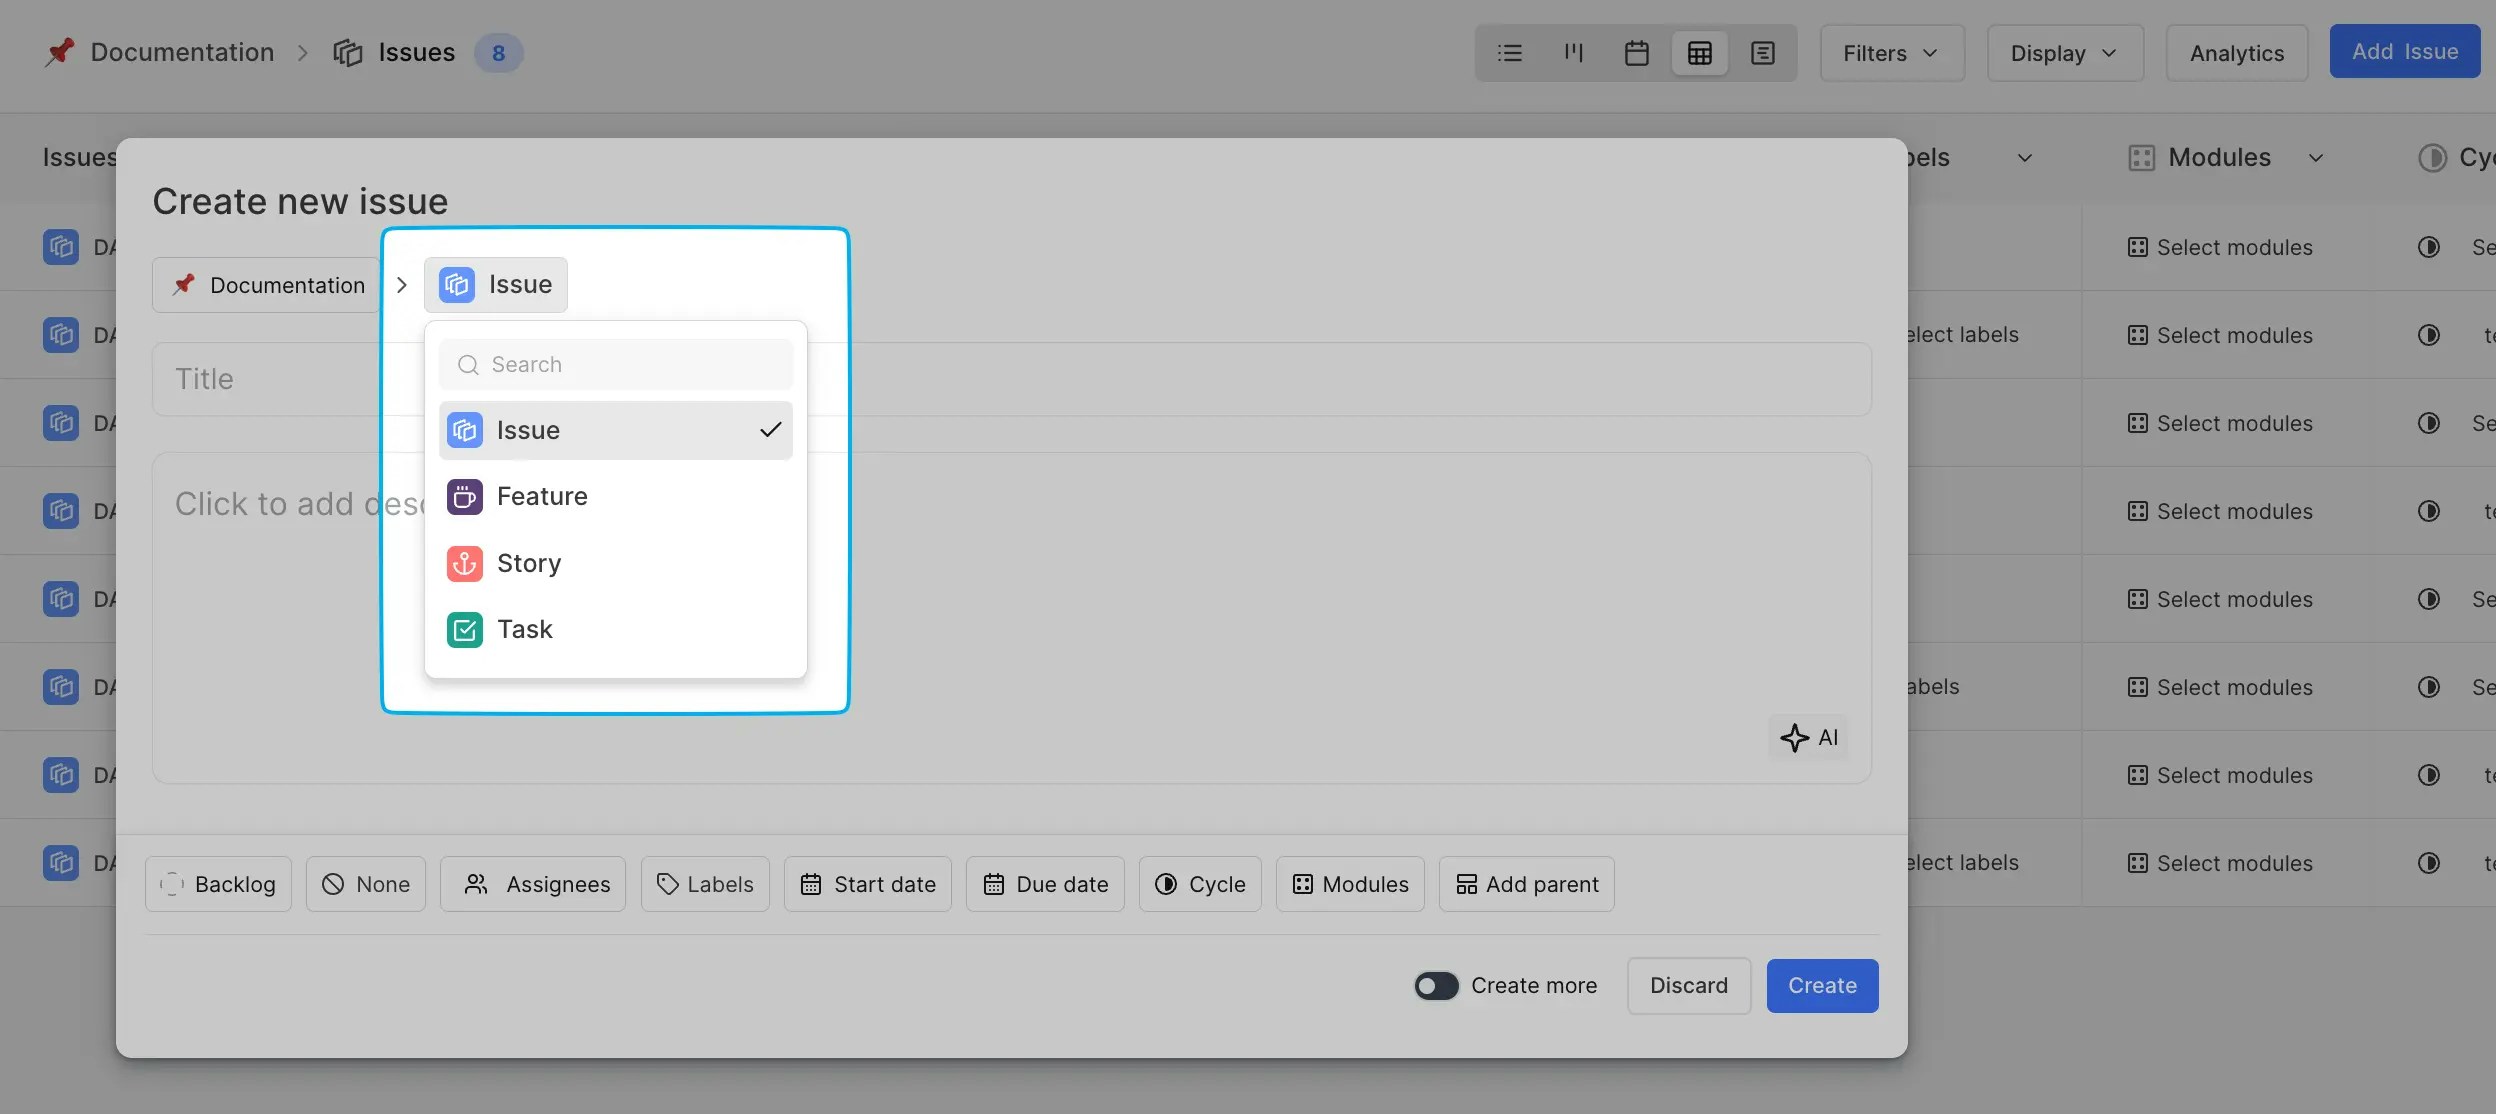
- In the Create new work item modal, the user can choose the desired work item type from the list at the top left corner. By default, the work item type
Issue is selected displaying both system-defined and custom properties.
- Changing the work item type will update the modal to display the relevant properties for that type.
- The system ensures that all properties marked as mandatory are filled before creating the work item.
When viewing work items, the work item type is displayed with an icon near the title for easy identification. Any custom properties added will also appear in the list of properties, and changes to these values are tracked in the work item’s activity trail.
Switch work item types
You can easily switch the work item’s type at any time. Just follow these steps:
- Open the work item you’d like to update.
- Hover over to the right of the work item ID and click Switch work item type. Alternatively, you can click Edit from the work item’s ellipsis (•••) menu to open the Update work item modal directly.
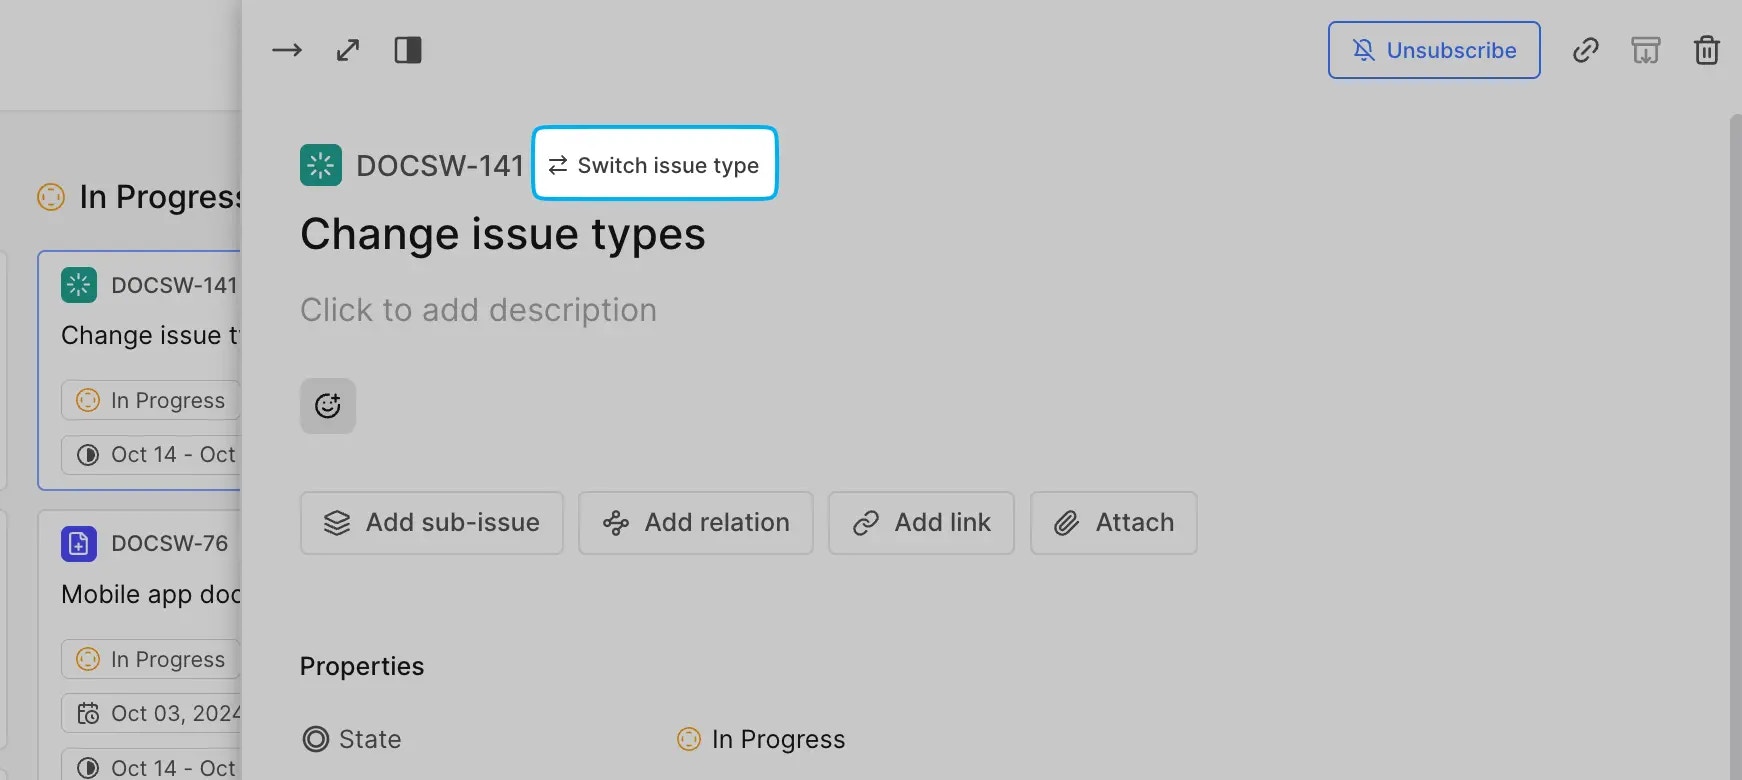
- Choose the new work item type from the dropdown next to your project name.
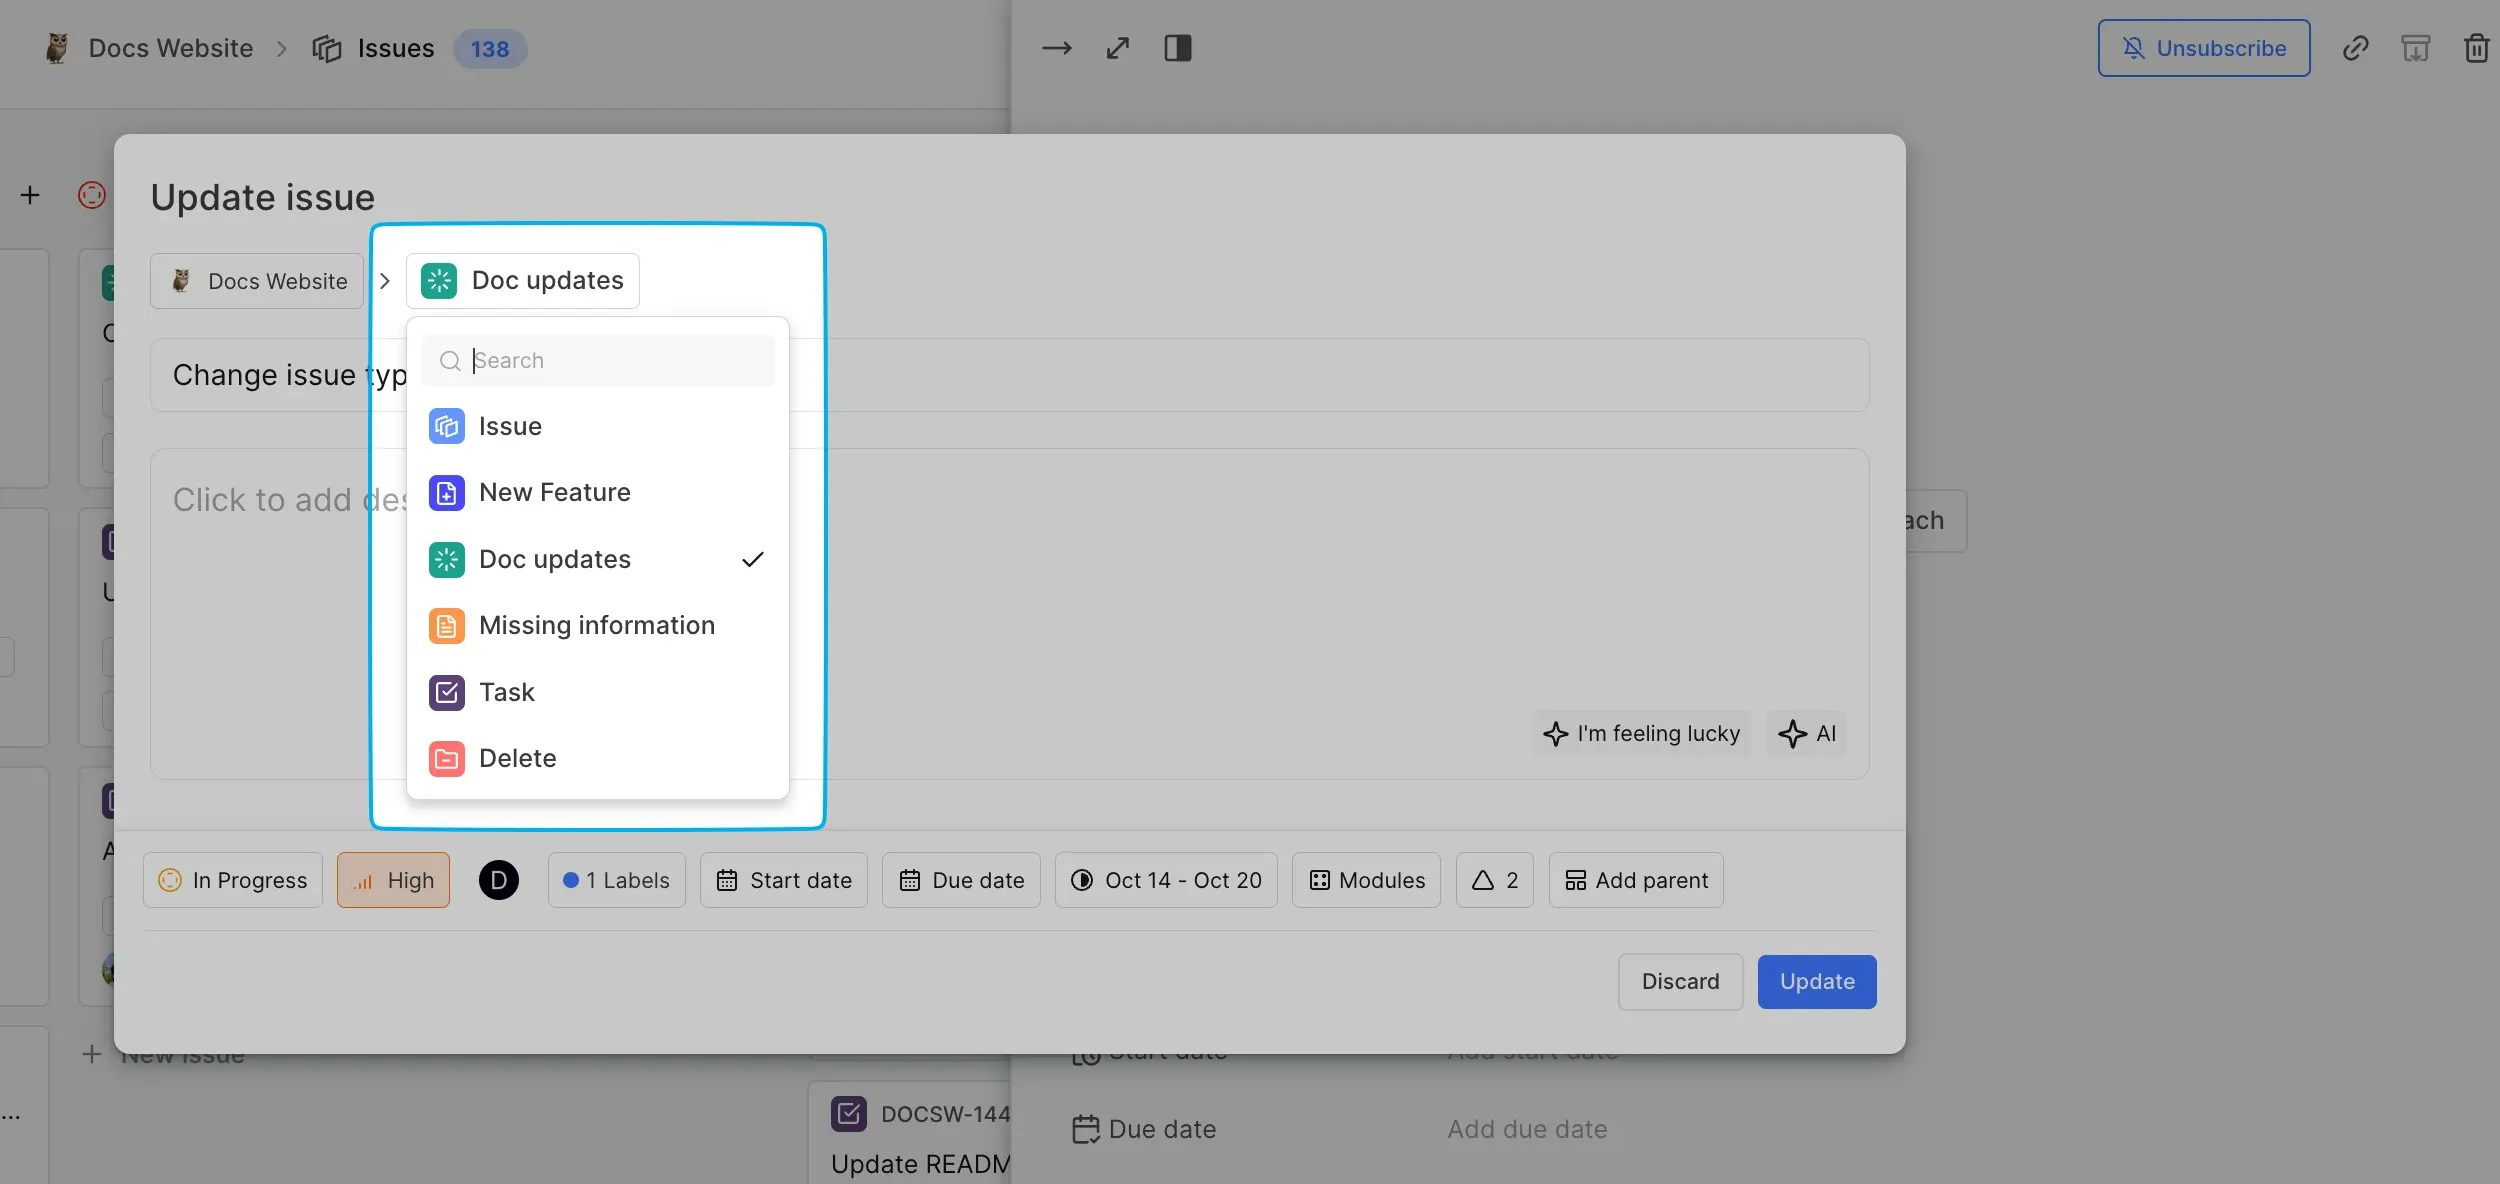
- Click Update to save your changes.
Bulk update work item types
You can change the work item types for several work items at once. Here’s how:
- Switch to the Spreadsheet layout in the Work items page.
- Select the work items you want to update.
- At the bottom of your screen, open the Work item type dropdown and pick the new work item type.
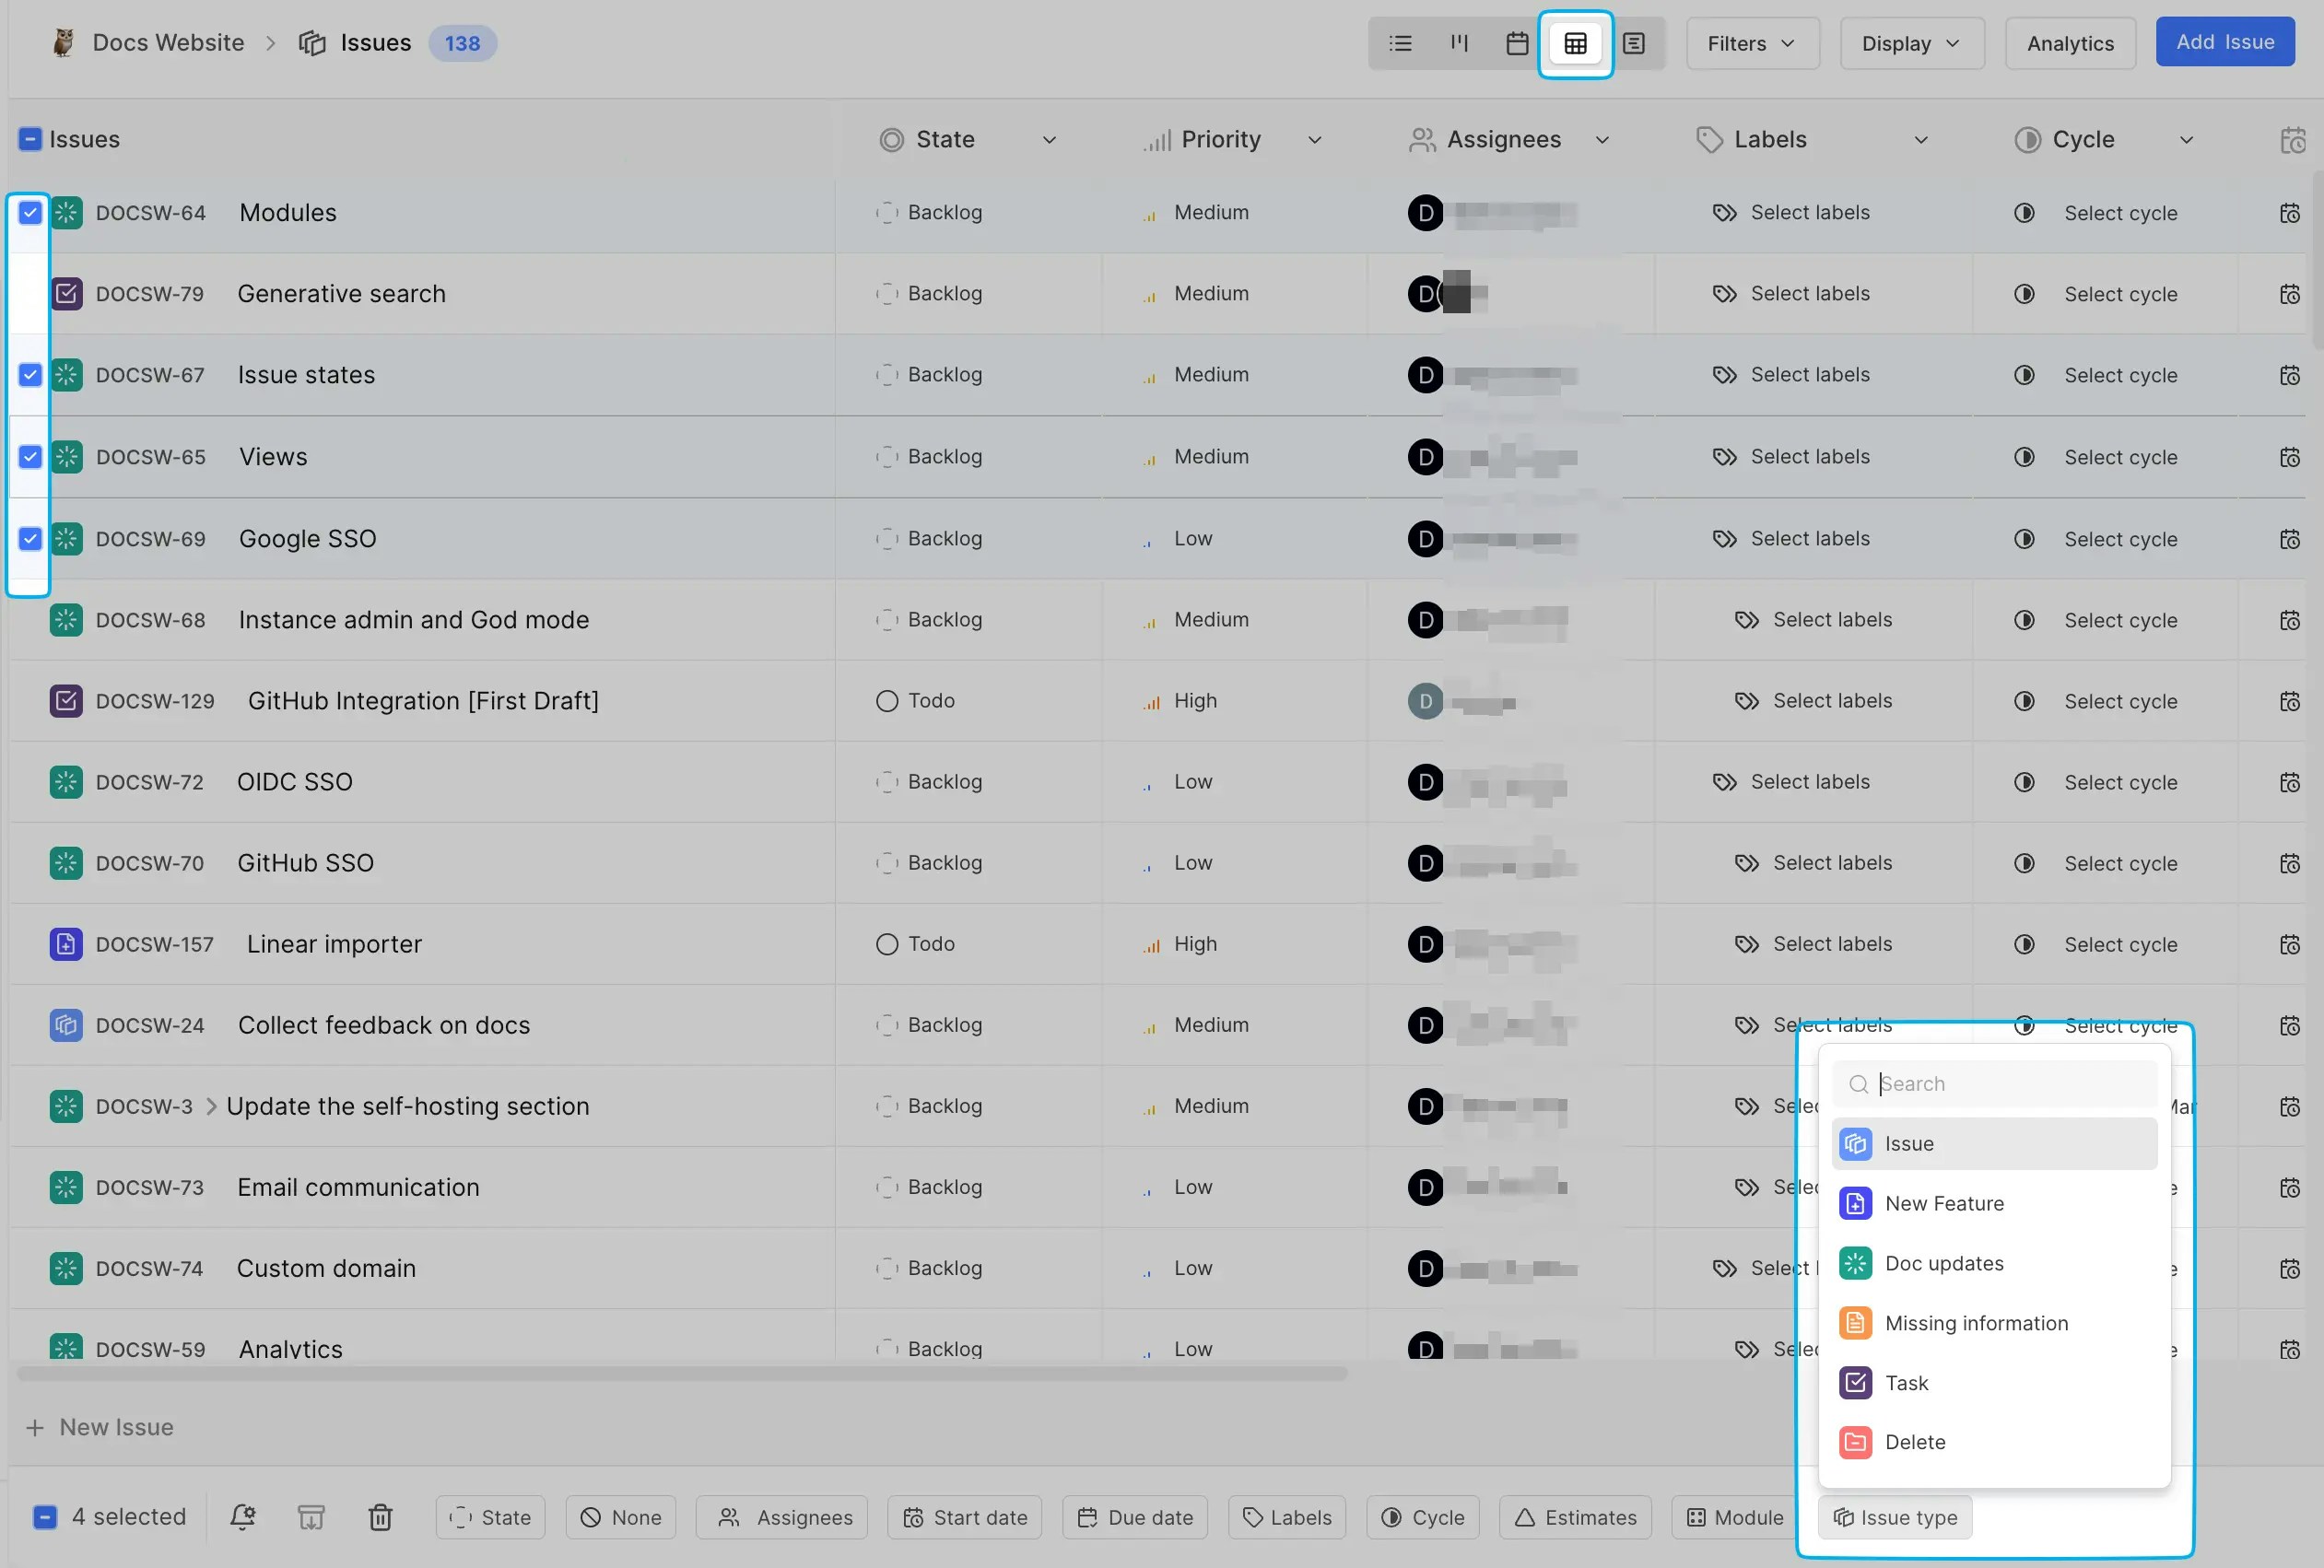
- Click Update to apply the changes.
Disable work item types
You can temporarily pause the creation of new work items for a specific work item type without affecting existing ones.
- Head to the Work item types screen in your project’s settings.
- Toggle off the switch next to the work item type you want to disable.