Enable Project States
Role: Workspace Admins
-
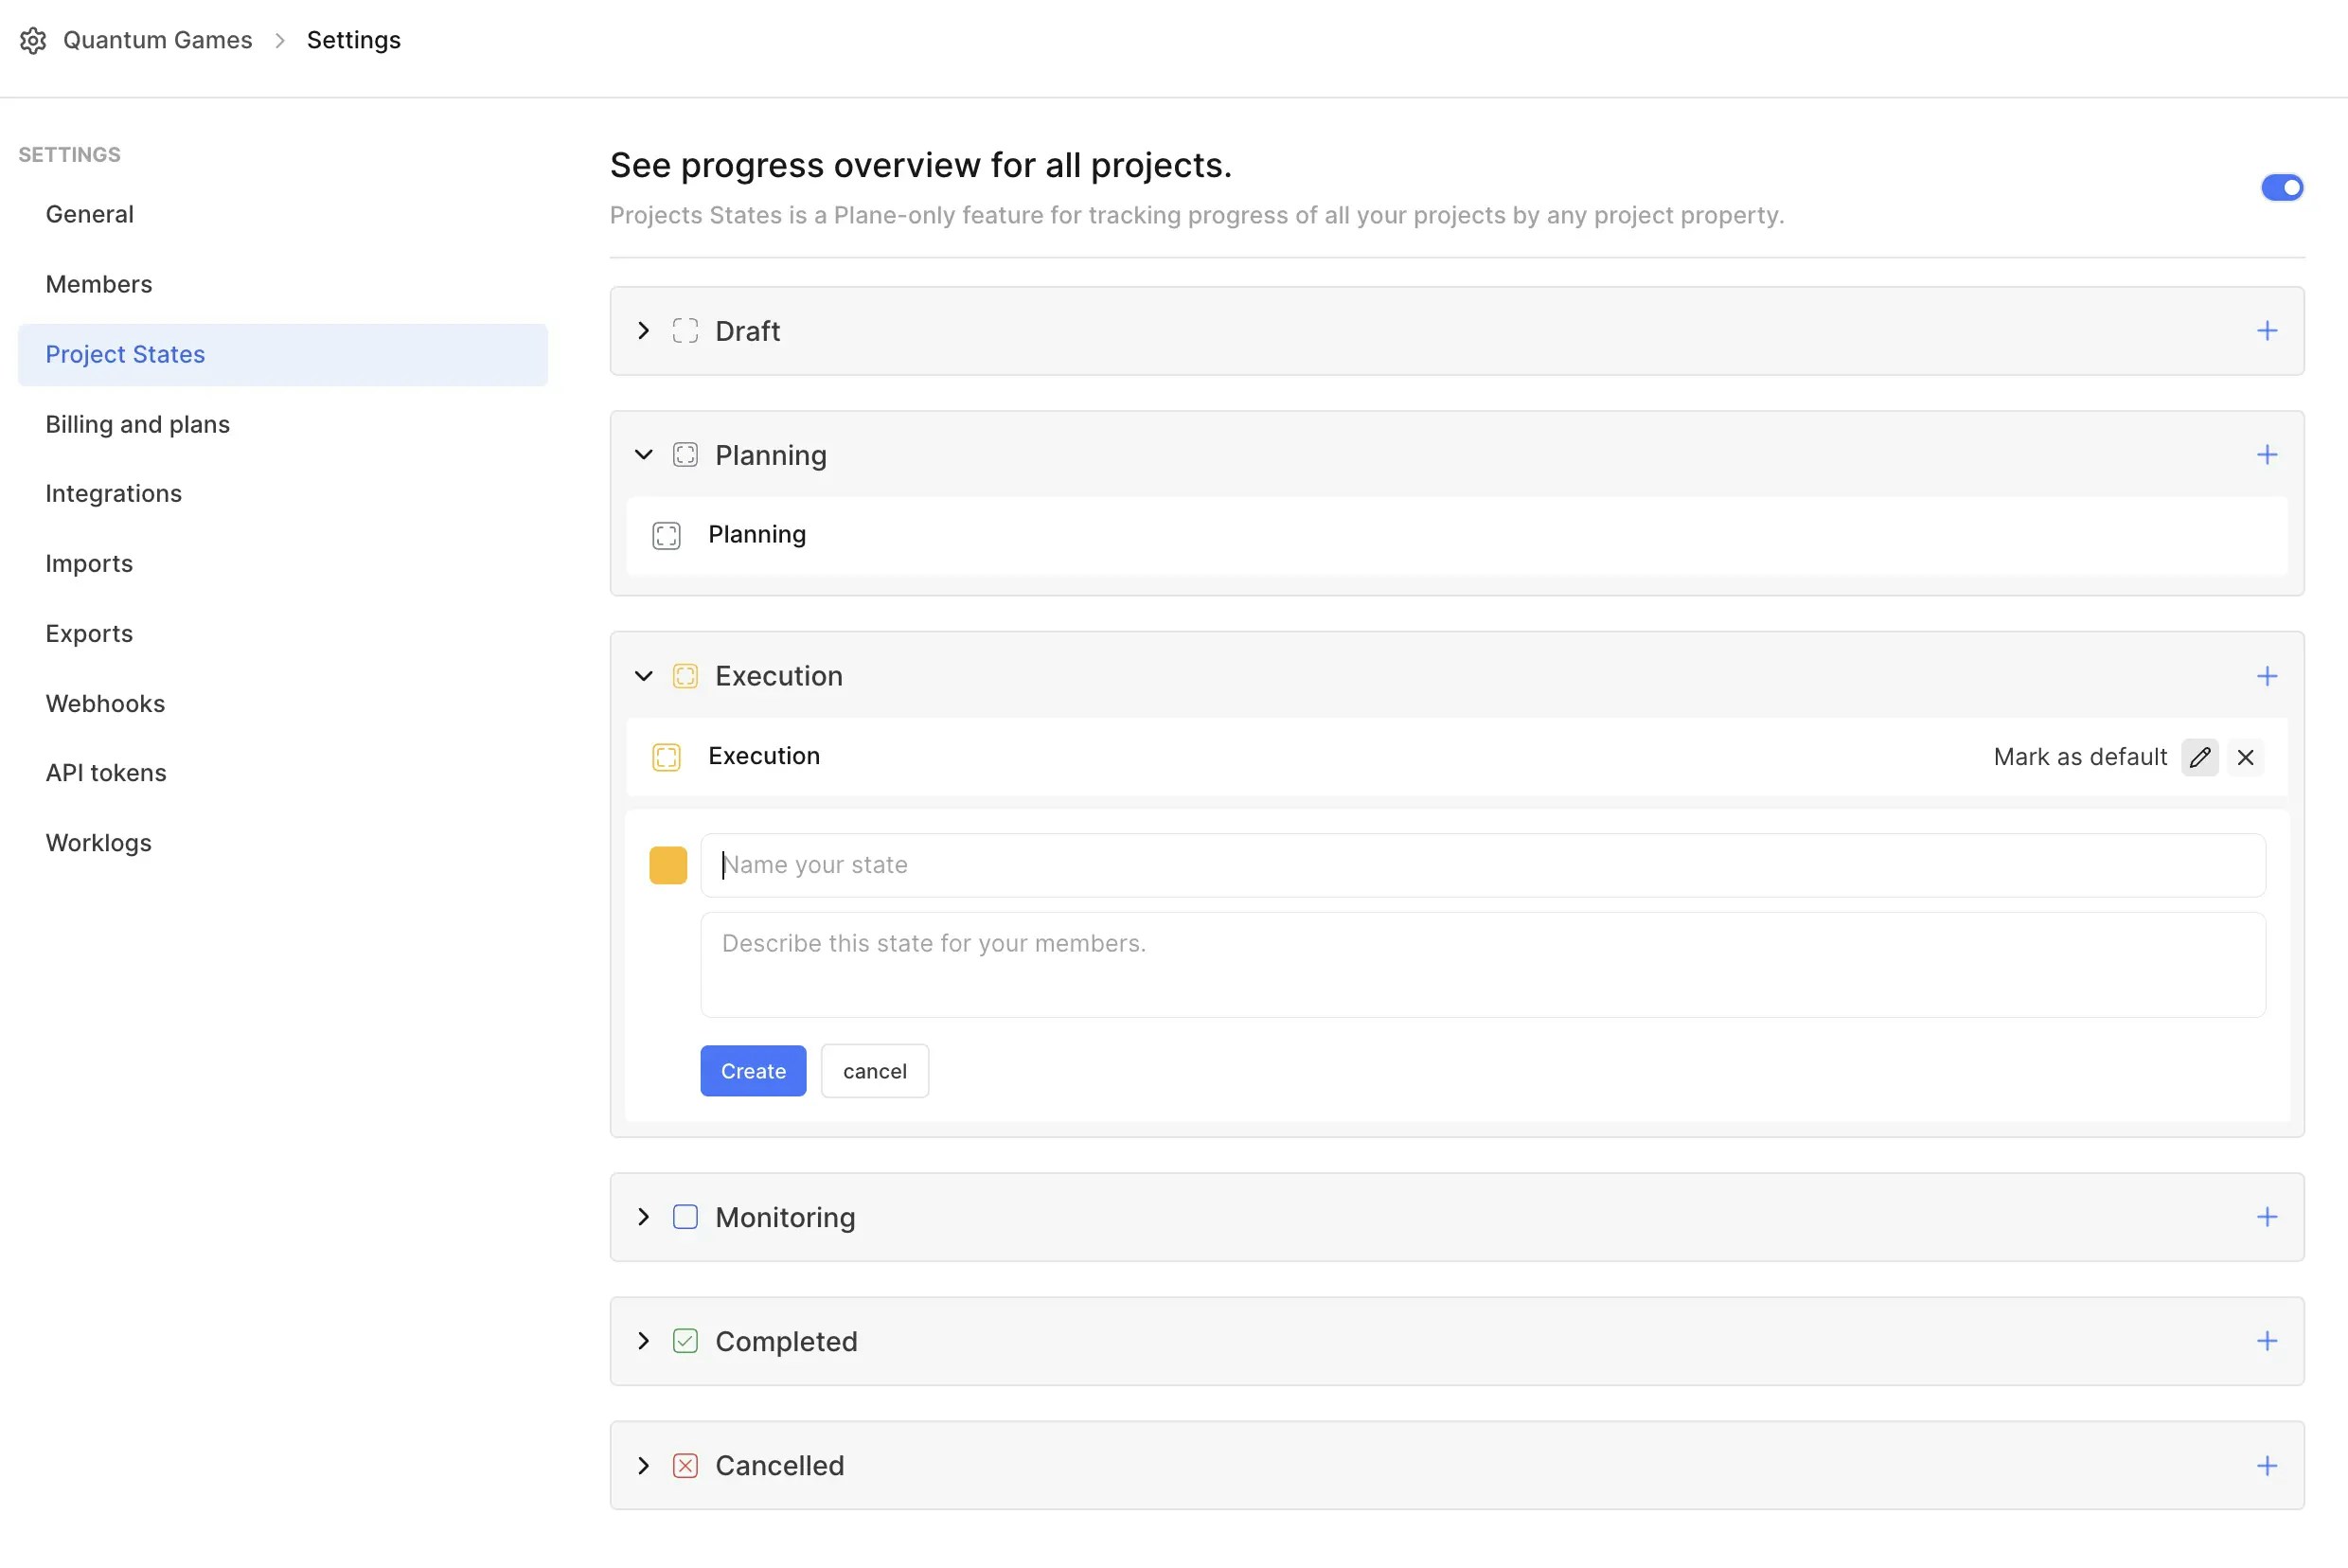
Navigate to Workspace Settings > Project States.

- Toggle the switch to turn on the feature.
-
There are default project state groups:
- Draft
- Planning
- Execution
- Monitoring
- Completed
- Cancelled
-
Modify state
- Click the pencil icon to edit the default state name and description.
- Click Update to save changes.
-
Add new state
- Use the + button to add a new state.
- Provide a name and description for the new state.
- Click Create.
Modify Project properties
-
Navigate to Projects on the sidebar.

-
In each project card, you’ll see a bunch of project properties.
- State: Set the project state.
- Priority: Highlight high-priority projects.
- Lead: Assign or change the project lead.
- Members: Update the team members working on the project.
- Start and end Dates: Add or adjust timelines.
Why use Project States?
- Stay organized Group projects based on their current stage, making it easier to prioritize and plan.
- Quick overview Gain a snapshot of all projects from a single view.
- Customizable workflow Adapt states to fit your team’s unique processes.