Import from Jira
Role: Workspace admins
To import issue types from Jira, make sure the Issue types feature is enabled in your Plane workspace.
- Click the ∨ icon next to your workspace name on the sidebar and select Workspace Settings.
-
Select Imports on the right pane and click the Import button in the Jira section.

-
In the Jira to Plane Migration Assistant screen, enter your Personal Access Token, User email and the Jira domain to allow Plane access to your Atlassian account.

- Click the Connect Jira button to link the accounts.
-
Click the Import button.

-
Configure Plane Select the Plane project where you want to import your Jira data and and click Next.

-
Configure Jira Choose the workspace and project in Jira from where you want to import data.
 If you’re on a paid plan (Pro or higher), issue types in Jira will be imported as work item types in Plane. On the free plan, issue types from Jira won’t be imported.
 -
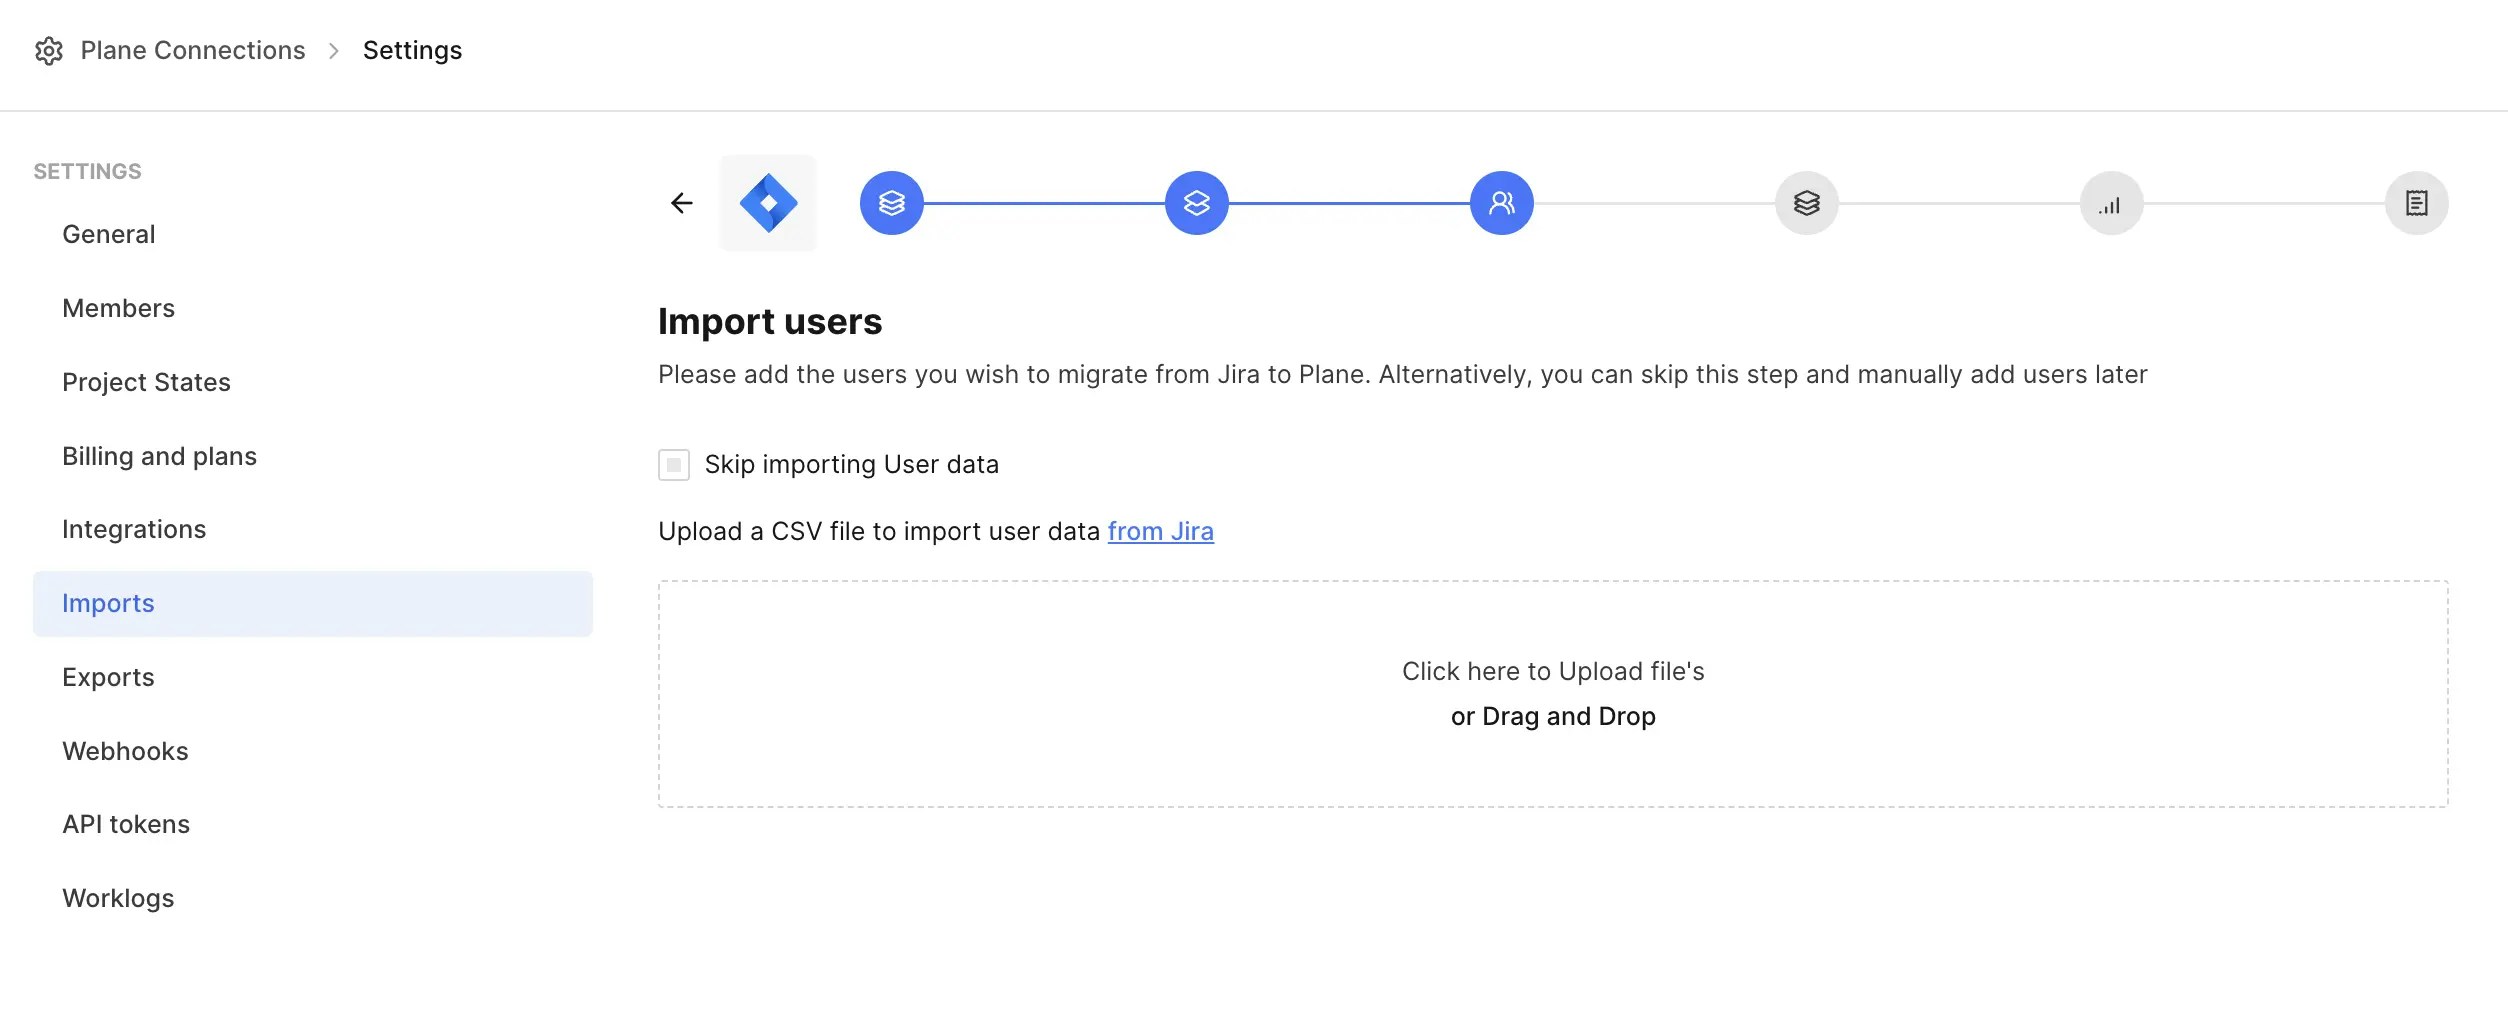
Import users Choose one of the following:
- Upload CSV Click the Upload CSV button to import users to your Plane project. Refer to Export users from a site to download the CSV file from Jira. (recommended)
- Skip user import You can select the Skip Importing User data checkbox and manually add users later.

-
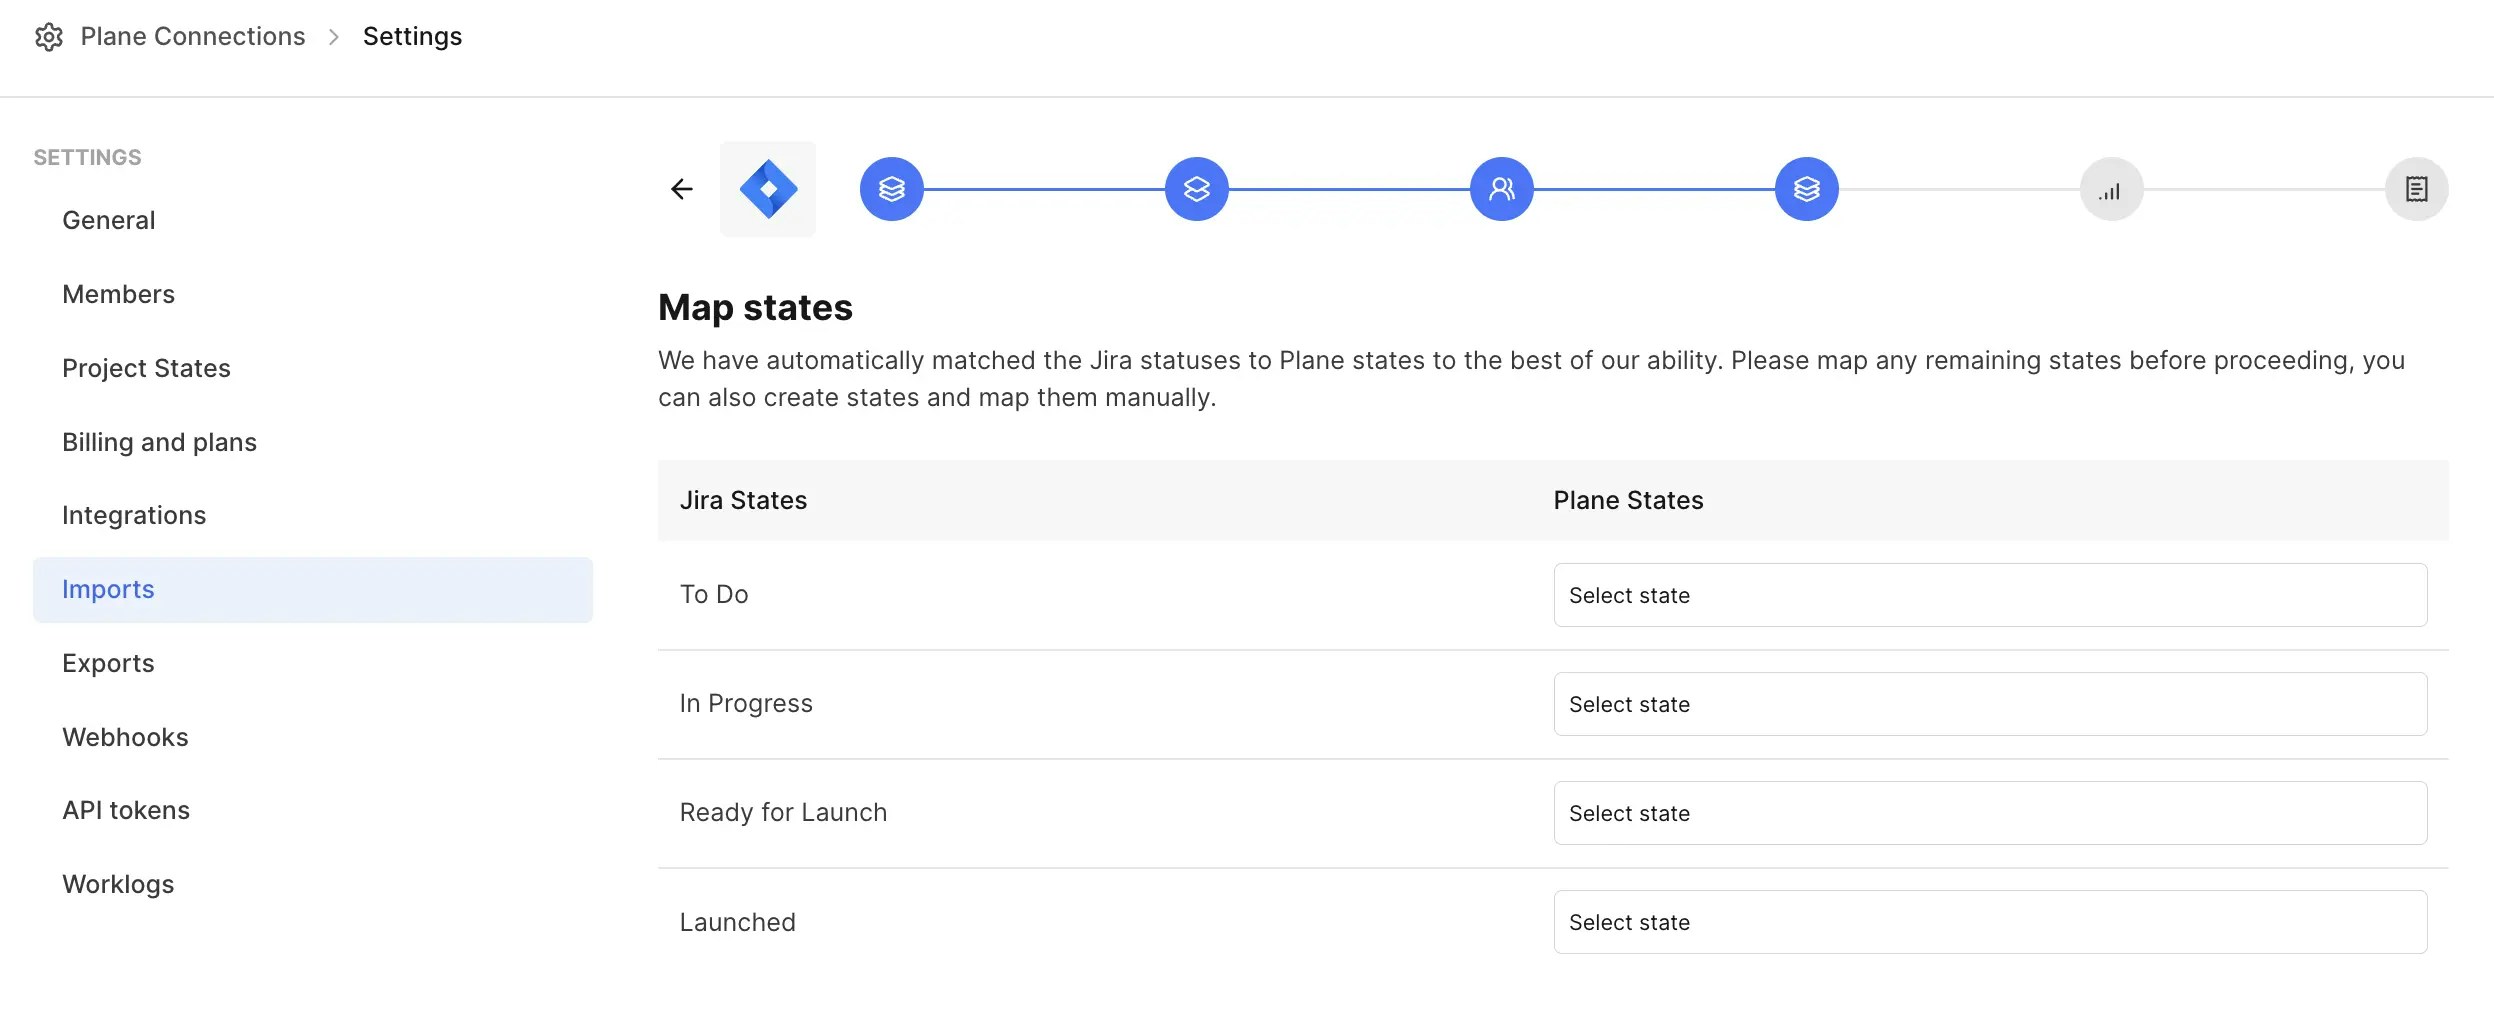
Map states
- Map Jira status to their equivalent Plane states.
- Select the Auto create and map the remaining Jira states checkbox to automatically create and map any missing states.

-
Map priorities Map the Jira priorities to the corresponding Plane priorities. If there’s no match, select None in the Plane priorities list.

-
Summary Review the mappings and make any changes if needed. Click Back to adjust, or click Confirm to start the migration.

-
The data migration begins and takes a few minutes to complete depending on the number of issues in your Jira workspace.

- Once it’s done, go to Work items in your Plane project to confirm that the data import is successful.
Imported entities
Here’s a quick look at what gets imported during the migration from Jira to Plane:| Jira | Plane | Notes |
|---|---|---|
| Labels | Labels | |
| Status | States | |
| Issue priorities | Priorities | |
| Users | Users | |
| Issues | Work items | |
| Relations | Parent | Includes only parent-child relationships |
| Issue comments | Work item comments | Includes username and timestamp. If you skip user import during migration, comments will show the name of the user who performed the migration. |
| Issue attachments | Work item attachments | |
| Reporter | Created by | |
| Created | Created at | |
| Assignee | Assignees | If you skip user import during migration, this will be blank. |
| Issue types | Labels | Prefix in Issue title | |
| Images in the Issue description | Images in the Work item description | |
| Summary | Work item title | |
| Start date | Start date | |
| Due date | Due date | |
| Linked Issues | Links | Includes backlinks to the original Jira issue. |
| Sprint | Cycles | Includes the work items, start and end date. |
| Components | Modules | Includes the work items. |
Sync Jira to Plane
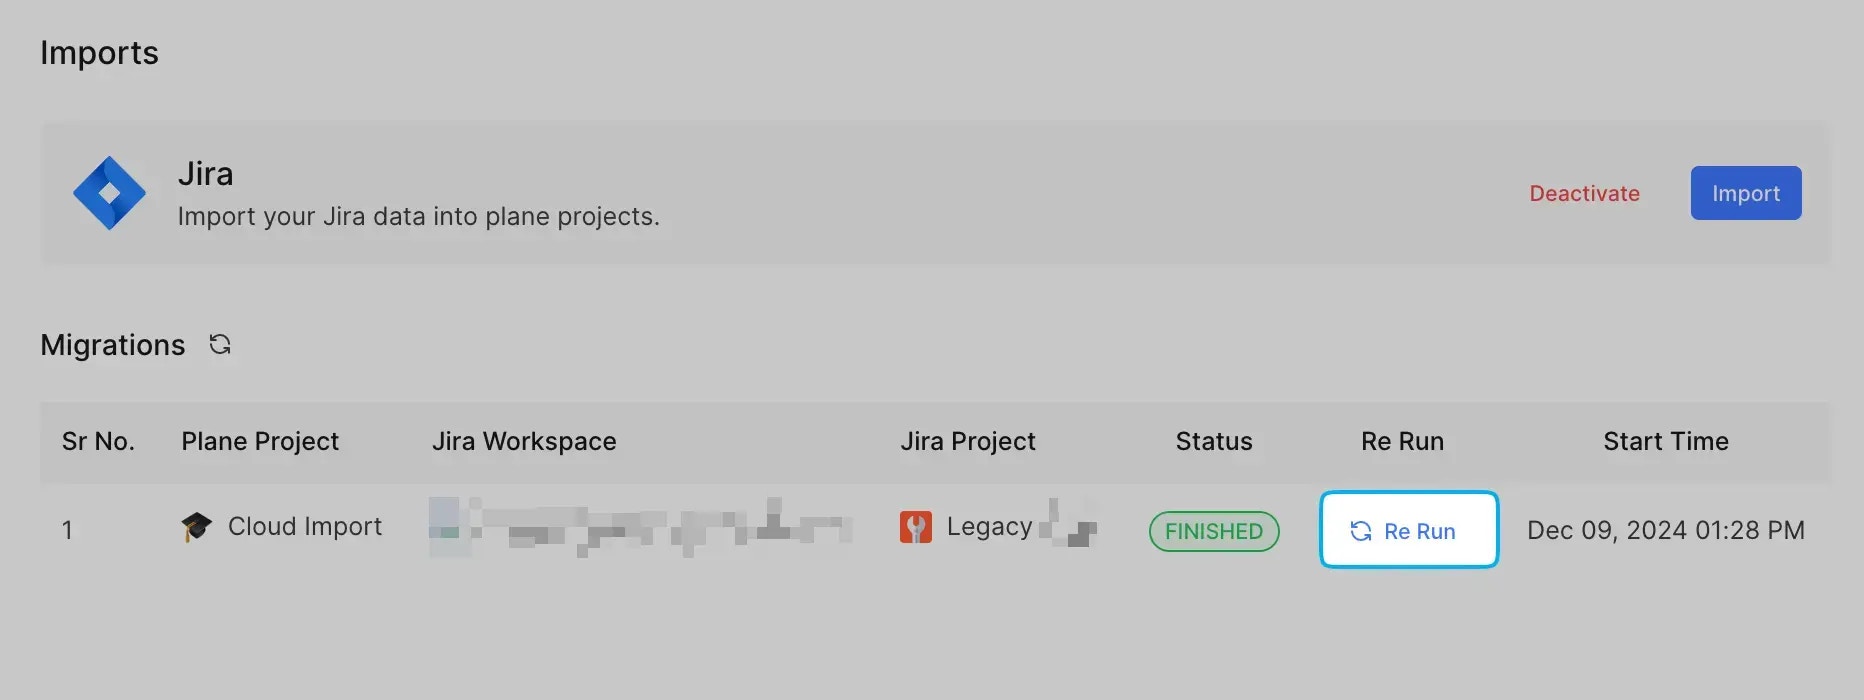
After the import, if there are any new or updated issues in Jira, you can easily sync these changes to Plane:- Go to Workspace settings.
- Select Imports on the right pane.
- Click the Re run button next to the project you want to sync.


